Table of Contents
Introduction
In this guide, you’ll learn how to install Sakila database in MySQL step by step, along with practical tips and queries.
Whenever you are learning MySQL or preparing for interviews, working with real-world datasets is very important. The Sakila database is one of the best datasets for practice purposes.
What is the Sakila Database?
The Sakila database is a MySQL sample database that models a DVD rental business.
It includes multiple tables for practice, such as: –
1. actor
2. actor_info
3. customer
4. film
5. payment
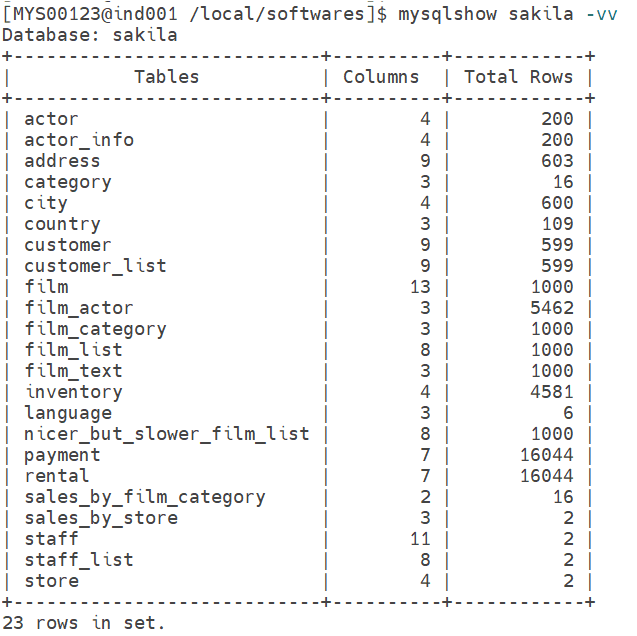
Total 23 tables are present in the Sakila database.The above tables are very useful for SQL queries, JOIN operations, and real-world scenarios.
Download Sakila Database
You can easily perform a Sakila database download from the official MySQL repository that you can find under Example Databases.
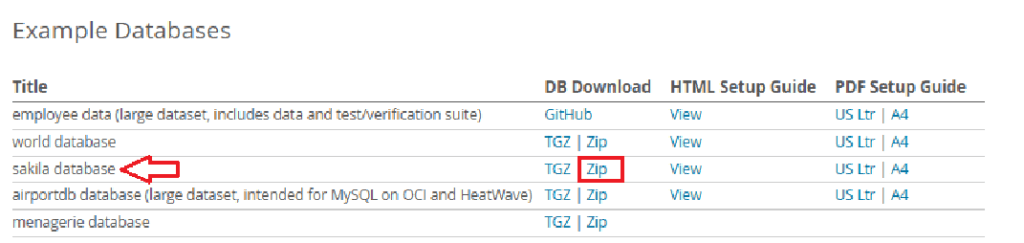
You will be able to see the 3 files once sakila database download has been completed.
1. Sakila Workbench File (ER diagram)
2. Sakila-schema.sql (Database Structure)
3. Sakila-data.sql (Sample Data)
Create the Sakila Database in MySQL
Log in to MySQL and create a database:
Before installing Sakila, make sure MySQL is properly installed on your system. You can follow my complete guide on MySQL Server Installation Using Generic Binary.
create database sakila;If you want to connect to the database, then use the following command:
use sakila;Import Schema File
Once you have created the Sakila database, you need to log in to it and run the following command.
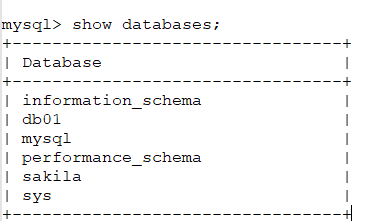
1. mysql -u root -p

2. show databases;

3) use sakila;

4) source sakila-schema.sql
Output

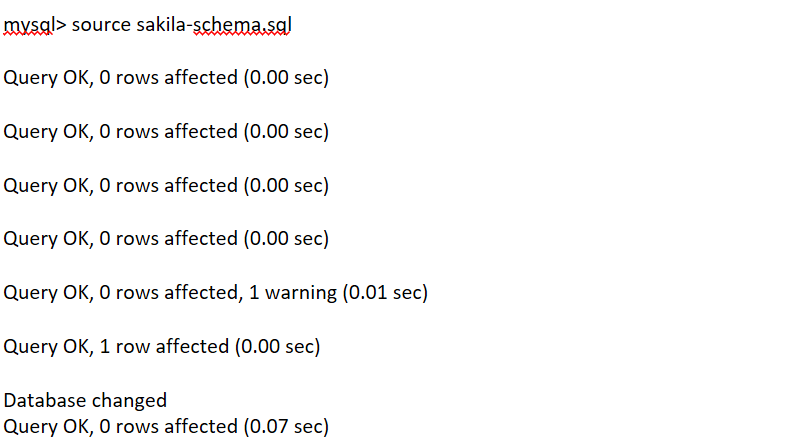
As of now, only the structure is created, and we need to insert the data with the help of the sakila-data.sql file. You can check by using the following command: –
mysql> select * from sakila.actor;
Empty set (0.00 sec)
Import Data File
Now it's time to load the actual data by using the sakila-data.sql file.
Command
mysql> source sakila-data.sqlOutput
mysql> source sakila-data.sql

Database changed
Query OK, 0 rows affected (0.00 sec)

Query OK, 200 rows affected (0.01 sec)
Records: 200  Duplicates: 0  Warnings: 0

Query OK, 603 rows affected (0.13 sec)
Records: 603  Duplicates: 0  Warnings: 0

Query OK, 16 rows affected (0.00 sec)
Records: 16  Duplicates: 0  Warnings: 0

Query OK, 600 rows affected (0.04 sec)
Records: 600  Duplicates: 0  Warnings: 0

Query OK, 109 rows affected (0.00 sec)
Records: 109  Duplicates: 0  Warnings: 0

Query OK, 599 rows affected (0.08 sec)
Records: 599  Duplicates: 0  Warnings: 0

Query OK, 1000 rows affected (0.28 sec)
Records: 1000  Duplicates: 0  Warnings: 0

Query OK, 5462 rows affected (0.21 sec)
Records: 5462  Duplicates: 0  Warnings: 0

Query OK, 1000 rows affected (0.05 sec)
Records: 1000  Duplicates: 0  Warnings: 0

Query OK, 4581 rows affected (0.42 sec)
Records: 4581  Duplicates: 0  Warnings: 0

Query OK, 6 rows affected (0.00 sec)
Records: 6  Duplicates: 0  Warnings: 0

Query OK, 14881 rows affected (1.17 sec)
Records: 14881  Duplicates: 0  Warnings: 0

Query OK, 1163 rows affected (0.04 sec)
Records: 1163  Duplicates: 0  Warnings: 0

Query OK, 12377 rows affected (1.15 sec)
Records: 12377  Duplicates: 0  Warnings: 0

Query OK, 3667 rows affected (0.13 sec)
Records: 3667  Duplicates: 0  Warnings: 0

Query OK, 2 rows affected (0.01 sec)
Records: 2  Duplicates: 0  Warnings: 0

Query OK, 2 rows affected (0.01 sec)
Records: 2  Duplicates: 0  Warnings: 0
Data Verification
We can check whether data has been updated by using the following query for one of the tables in sakila database.

If you want to check the columns and total rows in the MySql sample database, then you can use the command below to check the same.
Conclusion
In this guide, you learned how to install Sakila database in MySQL step-by-step and how to verify it using simple queries.
In my next article, I will cover the steps for importing the Sakila database in MySQL Workbench.
If you enjoyed the article, please leave a comment and share it with your friends. Also, let me know which Oracle and MySQL topics you'd like to see covered in future articles.
Note: – If you want to practice this whole activity in your home lab, then you'll need a platform to perform the installation. To set that up, you first need to download and install Oracle VirtualBox, followed by the operating system, the MySQL binary software, and finally, MySQL server creation.
Related Articles
1. How to Install MySQL Workbench in Windows
2. Sakila Database Import in MySQL Workbench