Table of Contents
Introduction
In this guide, I will cover the steps to fix MySQL Access Denied for Root User (ERROR 1045), so that you can log in to your MySQL root account again without any hassle.
Seeing ERROR 1045: Access denied for user 'root'@'localhost' (using password: YES) while logging in to MySQL is quite common. This usually occurs due to incorrect credentials or permission issues.
MySQL Access Denied for Root User
I faced an access issue when I tried to log in to one of my MySQL databases to perform the health check.

Solution to resolve access denied for user root localhost
Step 1) Check Server status
Command : - ps -ef | grep mysqldOutput

Step 2) Stop the Server
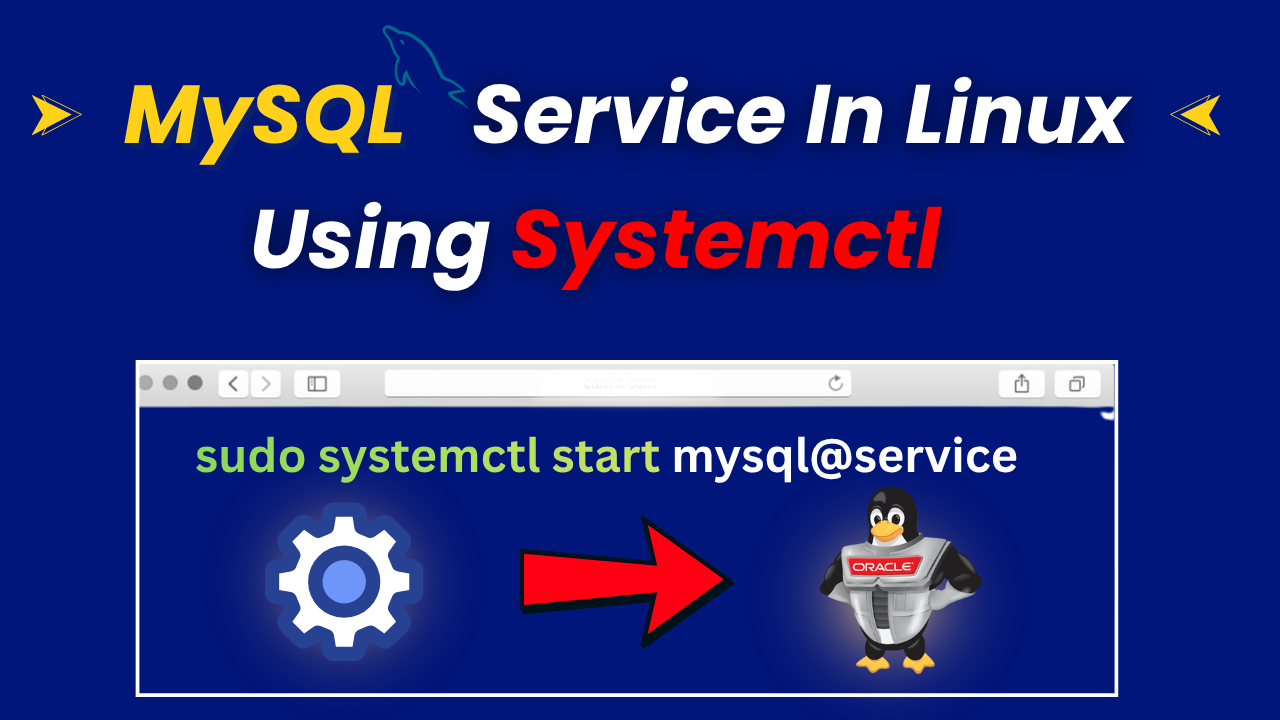
In the case of the Binary Method
Command : - sudo systemctl stop mysql@MYS00999In the case of the RPM (repository or without repository) based method.
Command : - sudo systemctl stop mysqld
Output

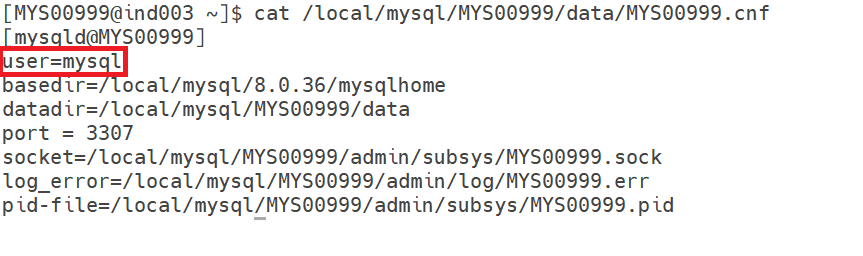
Step 3) Add MySQL User entry in the configuration file
Add the user entry if not present in the configuration file.
Step 4) Create the Temporary Text password file
vi /tmp/MYS00999_root_pwd.txt

alter user 'root@localhost' identified by 'Admin123#';
Step 5) Start the server to initialize with above created file
If you are using the binary method.
/local/mysql/8.0.36/mysqlhome/bin/mysqld --defaults-file=/local/mysql/MYS00999/data/MYS00999.cnf --init-file= /tmp/MYS00999_root_pwd.txt &If you are using the RPM (repository or without repository) method.
/local/mysql/8.0.36/mysqlhome/bin/mysqld --init-file=/tmp/MYS00999_root_pwd.txt &Note: – There are chances you will face the datadir not found issue during execution of the initialize command. In that case, you can use the datadir path as well and execute it.
Error :
2026-03-24T07:07:07.560562Z 0 [ERROR] [MY-013276] [Server] Failed to set datadir to '/local/mysql/8.0.36/mysqlhome/data/' (OS errno: 2 - No such file or directory)
2026-03-24T07:07:07.560615Z 0 [ERROR] [MY-010119] [Server] Aborting
Correct command to use :
/local/mysql/8.0.36/mysqlhome/bin/mysqld --defaults-file=/local/mysql/MYS00999/data/MYS00999.cnf --datadir=/local/mysql/MYS00999/data --init-file=/tmp/MYS00999_root_pwd.txt &Output
Check the MySQL process status
ps -ef | grep mysqldOutput

Step 6) Log in with the new password for verification
In case you are unable to log in even after proper initialization and getting the below issue, then you need to follow the steps below to log in properly.

a) First, you need to check the mysqld server process using the command below.
ps -ef | grep mysqldOutput
[MYS00999@ind003 /local/mysql/MYS00999/admin/log]$ ps -ef | grep mysqld
mysql     4323  3797  0 12:51 pts/2    00:00:07 /local/mysql/8.0.36/mysqlhome/bin/mysqld --defaults-file=/local/mysql/MYS00999/data/MYS00999.cnf --datadir=/local/mysql/MYS00999/data --init-file=/tmp/MYS00999_root_pwd.txt
b) next you need to check if the socket file is present using the command below
ls -l /local/mysql/MYS00999/admin/subsys/MYS00999.sockOutput
[MYS00999@ind003 /local/mysql/MYS00999/admin/log]$ ls -l /local/mysql/MYS00999/admin/subsys/MYS00999.sock
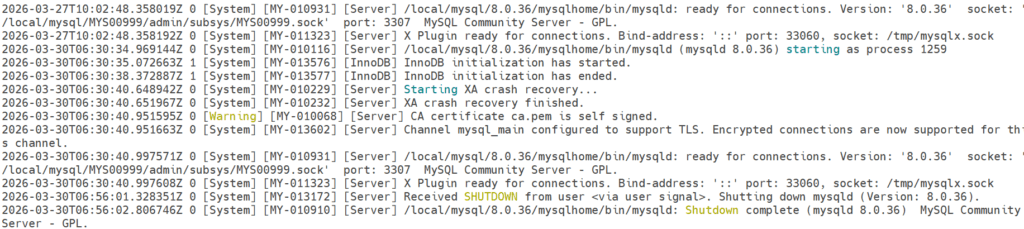
ls: cannot access /local/mysql/MYS00999/admin/subsys/MYS00999.sock: No such file or directoryAs the Socket file is not created, due to which you are unable to log in, a new password has been set by using the initialize command, whereas the server has not started because in the error log, it shows it has shut down after resetting the password.
Output

c) Next, you need to kill the existing MySQL process, which we saw in step a, and again need to start using the systemctl command.
kill -9 4323d) Start the MySQL server again using the systemctl command and also check the socket file status.
Output

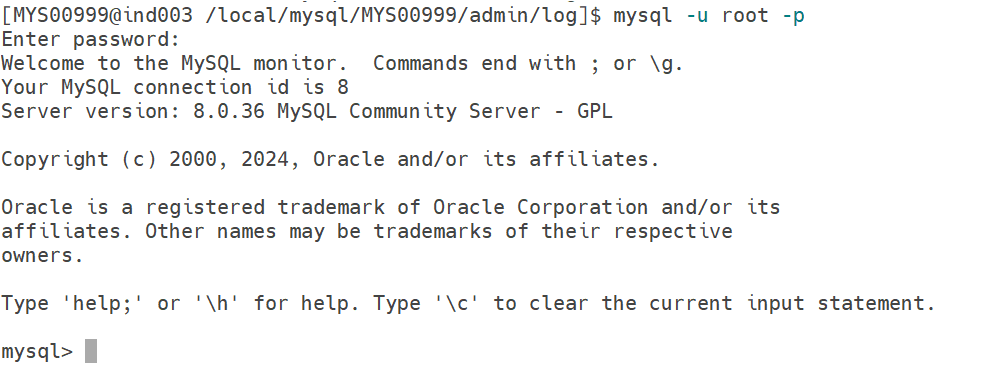
e) Now, try to take the connection using the command below.
mysql -u root -pOutput
Step 7) Reset the root user password
Now, reset the password to fix the MySQL Access Denied for Root User using the command below.
alter user root@localhost identified by 'root';Output

Conclusion
By following this approach, you can easily fix the MySQL Access Denied for Root User.
If you enjoyed the article, please leave a comment and share it with your friends. Also, let me know which Oracle and MySQL topics you'd like to see covered in future articles.
Note: – If you want to practice this whole activity in your home lab, then you'll need a platform to perform the installation. To set that up, you first need to download and install Oracle VirtualBox, followed by the operating system, the MySQL binary software, and finally, MySQL server creation.
Related Articles
1. Mysql Installation using Repository method (RPM-based)
2. Mysql Installation without using the repository method (RPM-based)