Table of Contents
Introduction
In this article, we’ll walk through the steps on How to install Oracle 19c binaries on Linux using both the Silent method and the Graphical User Interface (GUI) approach.
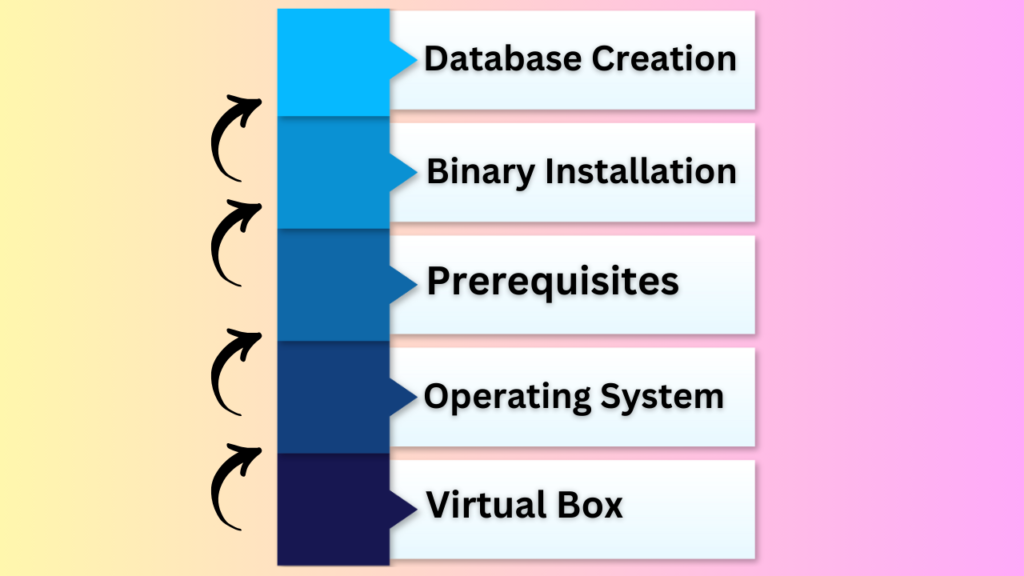
Hold on—where are you planning to install the binaries? You’ll need a platform to perform the installation. To set that up, you first need to download and install Oracle VirtualBox, followed by the operating system, the Oracle binary software, and finally, create the database.

In real time you don't need to install the Operating system as the Linux team will do it, but you should know how they are doing their task so that you will get to know this activity end to end.
How to install Oracle 19c binaries on Linux
1. Prerequisites
We need to run the below command to perform the prerequisites.
yum install -y oracle-database-preinstall-19c
Output

yum update -y
Output

2. User Creation
Note: – When you execute the prerequisites command then it will automatically create the ORACLE user and OINSTALL group.
The command for reference: – useradd -u 5007 -g oinstall -G dba -d /home/oracle oracle
g stands for Primary Group
G stands for Secondary Group
d stands for Oracle user home directory
3. Password Change for Oracle User
passwd oracle
Output

4. Directory Creation and Permissions
mkdir -p /u01/app/oracle/product/19.0.0/dbhome_1
mkdir -p /u01/app/oraInventory
chown -R oracle:oinstall /u01
chmod -R 775 /u01
Output

There are 2 ways to install Oracle Binaries. We will cover both methods one by one.
A. Silent mode Installation.
B. Graphical User Interface (GUI)
5. Silent mode Oracle Binary Installation
Step 1) You need to download the Oracle 19c Software file.
Step 2) Once downloaded share that file from the Host machine to the Virtual machine and unzip it.
Note: – The share option will be enabled once you have installed the Oracle VirtualBox Guest Additions
Step 3) You need to set the environment variables inside the .bash_profile for the Oracle user which is present under the /home/oracle path.
Note:- .bash_profile is the hidden file so to view it you need to run the ls -lart command which helps to see the hidden files in Oracle.
Environment Variables need to be set
# .bash_profile
# Get the aliases and functions
if [ -f ~/.bashrc ]; then
. ~/.bashrc
fi
# User specific environment and startup programs
export ORACLE_BASE=/u01/app/oracle
export ORACLE_HOME=/u01/app/oracle/product/19.0.0/dbhome_1
export LD_LIBRARY_PATH=$ORACLE_HOME/lib
export ORACLE_SID=ORA01234
export TNS_ADMIN=$ORACLE_HOME/network/admin
export PS1="\u@\h $ORACLE_SID \w$ "
PATH=$PATH:$HOME/.local/bin:$ORACLE_HOME/bin
export PATH
Note: – Kindly change the environment variables values as per your requirement.
. .bash_profile is the command to set profile variables.
Output

Step 4) Copy the Oracle 19c software file to the $ORACLE_HOME location and unzip it.
cd $ORACLE_HOME
unzip LINUX.X64_193000_db_home.zip
Step 5) Now need to run the Silent command to install Oracle 19c binaries on Linux
Note: – We will use the response file residing under the below location, put all the parameters inside it and finally execute it.
$ORACLE_HOME/install/response/db_install.rsp
oracle.install.responseFileVersion=/oracle/install/rspfmt_dbinstall_response_schema_v19.0.0
oracle.install.option=INSTALL_DB_SWONLY
ORACLE_HOSTNAME=${HOSTNAME}
UNIX_GROUP_NAME=oinstall
INVENTORY_LOCATION=/u01/app/oraInventory
SELECTED_LANGUAGES=en,en_GB
ORACLE_HOME=/u01/app/oracle/product/19.0.0/dbhome_1
ORACLE_BASE=/u01/app/oracle
oracle.install.db.InstallEdition=EE
oracle.install.db.OSDBA_GROUP=dba
oracle.install.db.OSOPER_GROUP=dba
oracle.install.db.OSBACKUPDBA_GROUP=dba
oracle.install.db.OSDGDBA_GROUP=dba
oracle.install.db.OSKMDBA_GROUP=dba
oracle.install.db.OSRACDBA_GROUP=dba
oracle.install.db.OSRACDBA_GROUP=dba
SECURITY_UPDATES_VIA_MYORACLESUPPORT=false
DECLINE_SECURITY_UPDATES=true
cd $ORACLE_HOME
./runInstaller -ignorePrereq -waitForCompletion -silent -responseFile /u01/app/oracle/product/19.0.0/dbhome_1/install/response/db_install.rsp
Output

We need to execute the root.sh script from the root user as a final step on How to install Oracle 19c binaries on Linux in Silent mode.

6. Graphical User Interface (GUI) method
Most people will face x11 variable not set issue whenever they are using the Graphical User Interface (GUI) method when using both Putty and MobaXterm.
You first have to resolve this x11 variable not set issue and then only you can proceed further.
ERROR: Unable to verify the graphical display setup. This application requires X display. Make sure that xdpyinfo exist under PATH variable.
No X11 DISPLAY variable was set, but this program performed an operation which requires it.
Step 1) Go to the Oracle_Home path and execute the runInstaller command.
cd $ORACLE_HOME
Step 2) Execute the runInstaller command and select the setup software-only option.
./runInstaller
Output
oracle@practice ORA01234 /u01/app/oracle/product/19.0.0/dbhome_1$ ./runInstaller
Launching Oracle Database Setup Wizard…

Step 3) Select the database installation option as a Single instance database.

Step 4) Select the Database edition option as Enterprise Edition.

Step 5) You need to put the path of ORACLE_BASE whereas the ORACLE_HOME path will take automatically because you have unzipped the binaries over there.

Step 6) Select the path for the Central Inventory.

Step 7) Select the Operating system level privileges as per your requirement.

Step 8) You can Manually run the root.sh and orainstRoot.sh script or you can use Automatic option as well by providing root or sudo credentials.

Step 9) After all the steps you will see the below summary output where you can edit it if you want to modify any changes.

Step 10) Now we need to run both root.sh and orainstRoot.sh script from root user.

Output
orainstRoot.sh
[root@practice ~]# /u01/app/oraInventory/orainstRoot.sh
Changing permissions of /u01/app/oraInventory.
Adding read,write permissions for group.
Removing read,write,execute permissions for world.
Changing groupname of /u01/app/oraInventory to oinstall.
The execution of the script is complete.
You have new mail in /var/spool/mail/root
root.sh
[root@practice ~]# /u01/app/oracle/product/19.0.0/dbhome_1/root.sh
Performing root user operation.
The following environment variables are set as:
ORACLE_OWNER= oracle
ORACLE_HOME= /u01/app/oracle/product/19.0.0/dbhome_1
Enter the full pathname of the local bin directory: [/usr/local/bin]:
The contents of "dbhome" have not changed. No need to overwrite.
The contents of "oraenv" have not changed. No need to overwrite.
The contents of "coraenv" have not changed. No need to overwrite.
Entries will be added to the /etc/oratab file as needed by
Database Configuration Assistant when a database is created
Finished running generic part of root script.
Now product-specific root actions will be performed.
Oracle Trace File Analyzer (TFA – Standalone Mode) is available at :
/u01/app/oracle/product/19.0.0/dbhome_1/bin/tfactl
Note :
1. tfactl will use TFA Service if that service is running and user has been granted access
2. tfactl will configure TFA Standalone Mode only if user has no access to TFA Service or TFA is not installed
Step 11) At last you will see the success screen.

Conclusion
We have seen both methods to install Oracle 19c binaries on Linux. Now I believe you know How to install Oracle 19c binaries on Linux.


