If you're diving into the world of databases, MySQL is likely one of the first names you'll encounter. But how do you get started with installing it on your machine? You need not worry; we have you covered! With the help of this detailed tutorial, you'll be able to complete the entire process and have install MySQL up and running in a matter of minutes.
Table of Contents
Introduction to MySQL Server
1. MySQL is an open-source relational database management system (RDBMS) widely used for web databases.
2. It is owned by Oracle and you can pay for its support.
3. The main advantages of MySQL over any other database the ease of use, inexpensive, reliability, and a large community of developers who can help if we face any issues.
To fully utilize MySQL Server, you must first learn how to install MySQL server and configure it.
Why Opt for a MySQL Server?
Before we proceed with the installation, let us briefly go over the reasons that MySQL is a recommended option:
Open-Source Flexibility: With a large community providing frequent updates and support, MySQL is available for free.
High Performance: MySQL is perfect for applications that need to process data quickly since it is optimized for high-speed reads and writes.
Cross-Platform Compatibility: There are various operating systems where MySQL is compatible for installation like MacOS, Windows, Linux etc.
Security and compliance: It is 100% built on MySQL Enterprise Edition which helps provide the highest reliability and security.
Now that you know why MySQL is a great choice, let’s get started to install MySQL server process.
Prerequisites to Install MySQL Server
Make sure your system meets the following requirements before you begin:
Operating System: Windows, macOS, or Linux
Administrator Privileges: You’ll need to run the installation as an administrator.
Internet Connection: To download the necessary files from the official MySQL website.
Disk Space: 1 GB of RAM (2 GB or more recommended), 1 GHz CPU or faster, 50 GB of available disk space.
Editions of MySQL Server
Enterprise: – MySQL Enterprise Edition includes the most comprehensive set of advanced features, management tools, and technical support to achieve the highest level of MySQL Scalability, reliability, and uptime. Developing, deploying, and maintaining business-critical MySQL applications is also less complicated, risky, and expensive.
Standard: – You may create scalable and high-performance online transaction processing (OLTP) applications with MySQL Standard Edition.
Community: – MySQL Community Edition is the free, downloadable version of the world’s most widely used open-source database It is backed by a large and engaged community of open-source developers.
Classic: – MySQL Classic Edition is the ideal embedded database for developing read-intensive applications using the MyIASM Storage Engine. It is proven as a high Performance and Zero administration database.
Notes: – For our practical, we will be installing the Community edition as it is open source and free to download.
Installation of MySQL Server in Linux
There are the steps that you need to follow to install MySQL Server. Before Starting, let us discuss all installation methods to install MySQL Server.
Method A) RPM-based installation with repository method.
Method B) RPM-based installation without using the repository method.
Method C) Binary-based installation.
In this article, we will see RPM-based installation with a repository method of version 8, but to proceed further, you require a Linux Machine using Oracle VirtualBox, which I have already created in other blogs. You can click on theinstall machine and then start your installation.
Note: – Method A and Method B will perform from the root user ,whereas in Method C We can use mysql or any other user for the installation.
Method A) RPM-based installation with repository method.
Step 1) Download the Repository RPM Package File directly to your machine using the wget command.
Go to MySQL Yum Repository Website and right-click on mysql80-community-release-el7-10.noarch.rpm file or any other updated version as per your requirement.
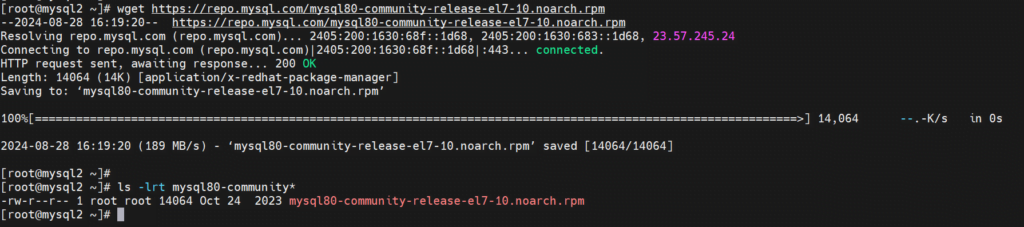
Step 2) Now you need to download the RPM file directly in your Virtual Machine by using the wget command.
Command: – wget https://repo.mysql.com/mysql80-community-release-el7-10.noarch.rpm
Step 3) Install the Repository RPM Package File
Note: – Command to check if any file is already installed. (yum list installed |grep mysql)
Command: – yum install -y mysql80-community-release-el7-10.noarch.rpm


Step 4) Install the Actual MySQL Software – RPM Based
Command: – yum -y install mysql-community-{server,client,common,libs}-* -y –nogpgcheck
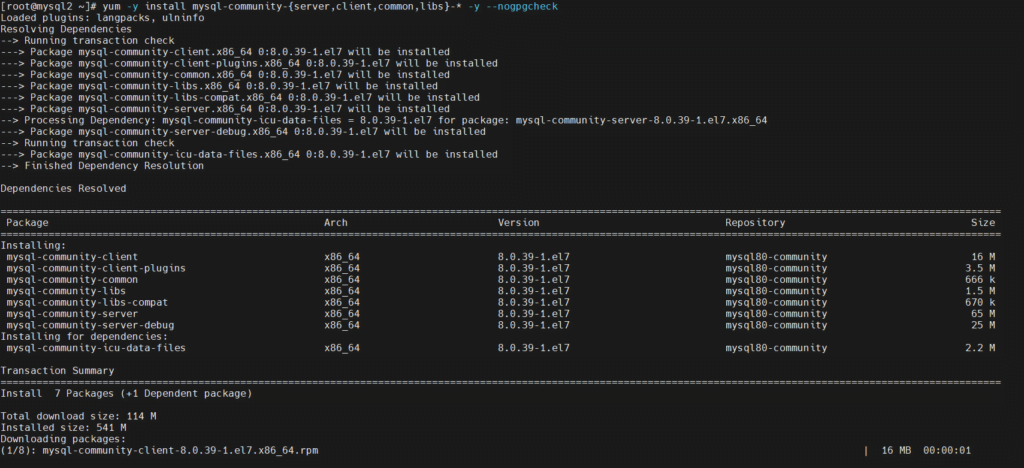
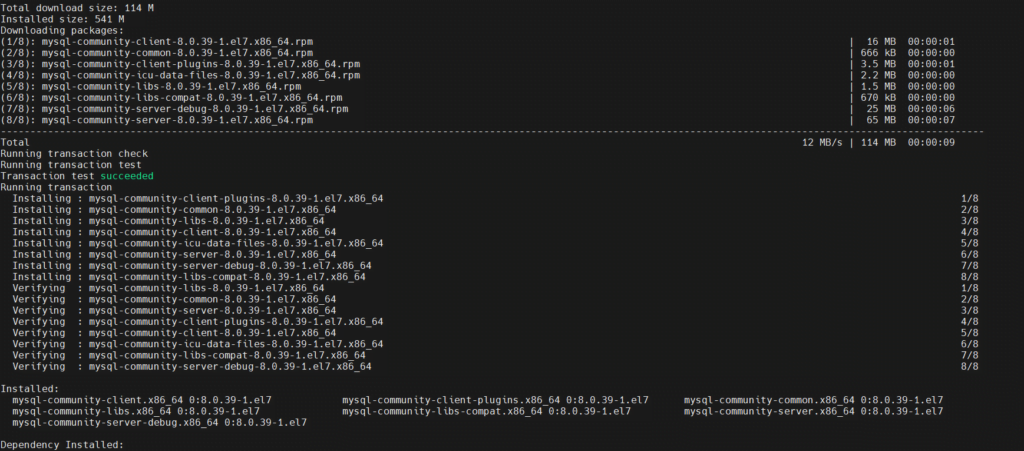

Now our Actual Software has been installed, and you can check from the command below that all the required RPMs are present.
Command: – yum list installed | grep mysql

Verifying the MySQL Server Installation
Now we need to check if we have installed the correct version so that we can use the command below for verification.

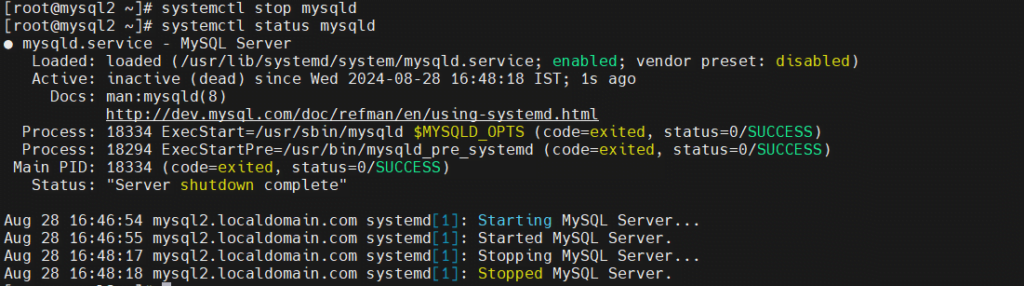
Starting and Stopping MySQL Server
Status: – systemctl status mysqld

Start: – systemctl start mysqld
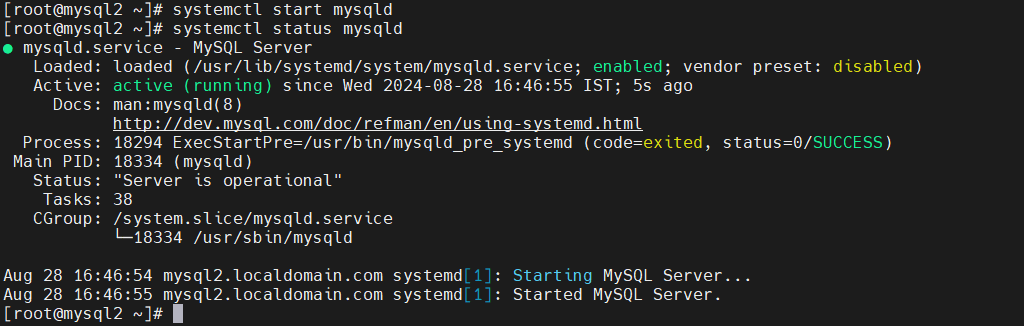
Stop: – systemctl stop mysqld
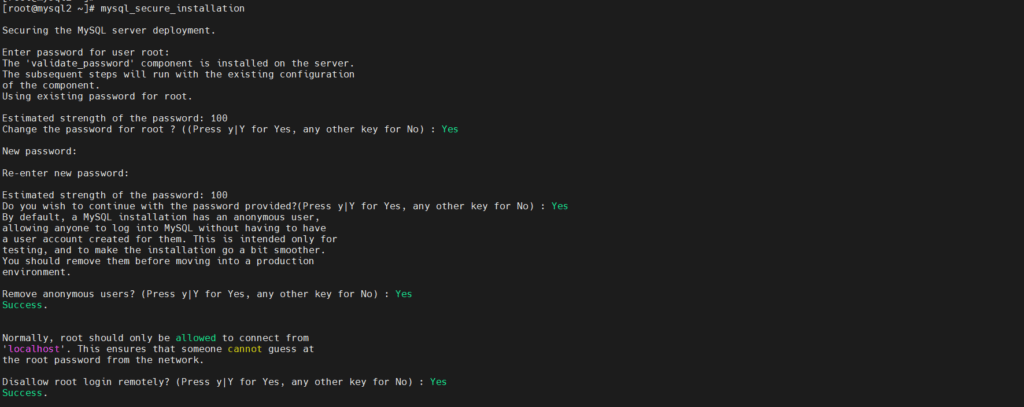
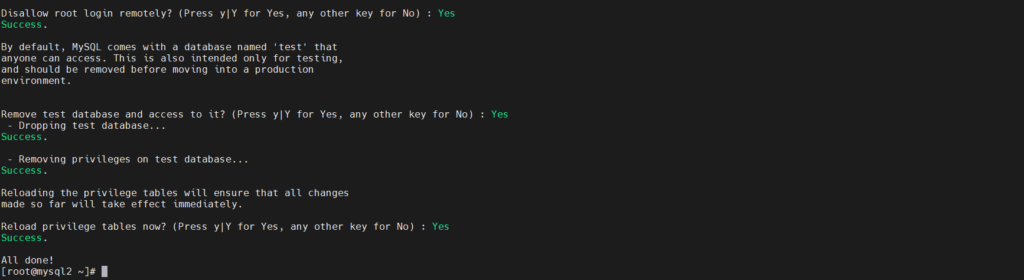
Securing Your MySQL Installation
We need to execute mysql_secure_installation to remove anonymous users, disable remote root login, and perform other security tweaks.
You will get a temporary password through which you can log in once, and then that password will expire, and you must change it again.
Temporary password location: – grep 'temporary password' /var/log/mysqld.log
[Note] [MY-010454] [Server] A temporary password is generated for root@localhost: zrweYtxq)3bk
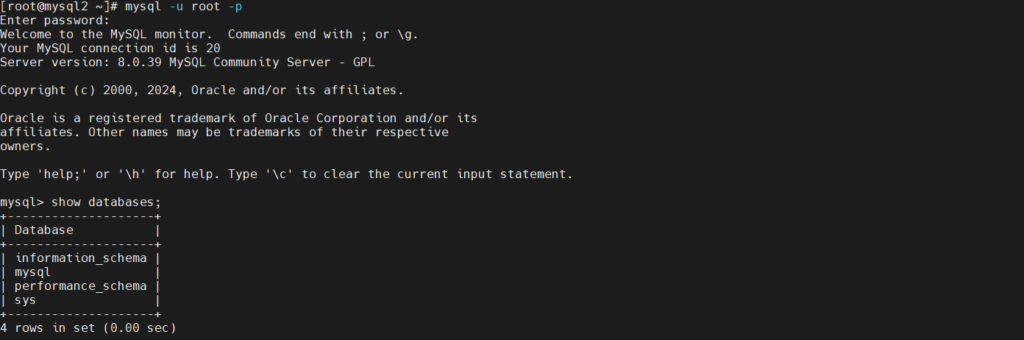
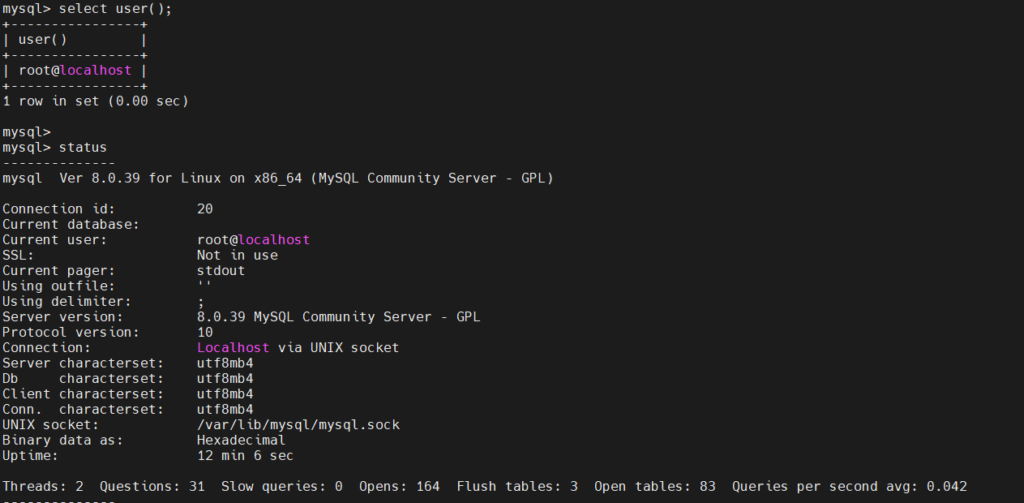
Testing Your MySQL Installation
Let’s test if everything is working as expected.
Command: – mysql -u root -p
Basic MySQL Commands for Beginners
Once you're connected to MySQL, you can start interacting with your databases. Here are a few basic commands:
Creating a Database: CREATE DATABASE my_database;
Listing Databases: SHOW DATABASES;
Selecting a Database: USE my_database;
Creating a Table: CREATE TABLE users (id INT AUTO_INCREMENT PRIMARY KEY, name VARCHAR(100), email VARCHAR(100));
Inserting Data: INSERT INTO users (name, email) VALUES ('John Doe', 'john@example.com');
Querying Data: SELECT * FROM users;
Conclusion
Installing MySQL Server is a simple process when broken down into manageable steps. Whether you’re on Windows, macOS, or Linux, this guide has you covered from downloading the software to running your first queries. With the installed MySQL Server, you’re now ready to start developing robust, data-driven applications.
Finally!! We have installed MySQL Server in Linux.
Note: – In case you are facing any issues, please do let me know in the comment section. I would be happy to help.
FAQ's
1) Is MySQL free or paid?
MySQL is available in both free and paid versions. The free version is the Community Edition, which is open-source and can be used without cost for personal and many commercial applications. The paid version is the Enterprise Edition, where you will get additional features like Workbenc,h which is a GUI tool through which you can manage all the operations easily.
2) How to download the free version of MySQL?
You need to follow the steps below to download the free version of MySQL, which is the community one.
1) Go to the MySQL Community page.
2) Click on MySQL Community Server, and you will be redirected to the download page.
3) Download the Mysql as per your Version and Operating system.
Note: – You will be able to download the tar bundle from the above steps, and then one by one you need to install it (server, client, common, libs,) etc.
If you need to download the RPM repository, then you can follow the steps below.
1) Download the Repository RPM Package File directly to your machine using the wget command.
Go to MySQL Yum Repository Website and right-click on mysql80-community-release-el7-10.noarch.rpm file or any other updated version as per your requirement, and download it.