Table of Contents
Introduction
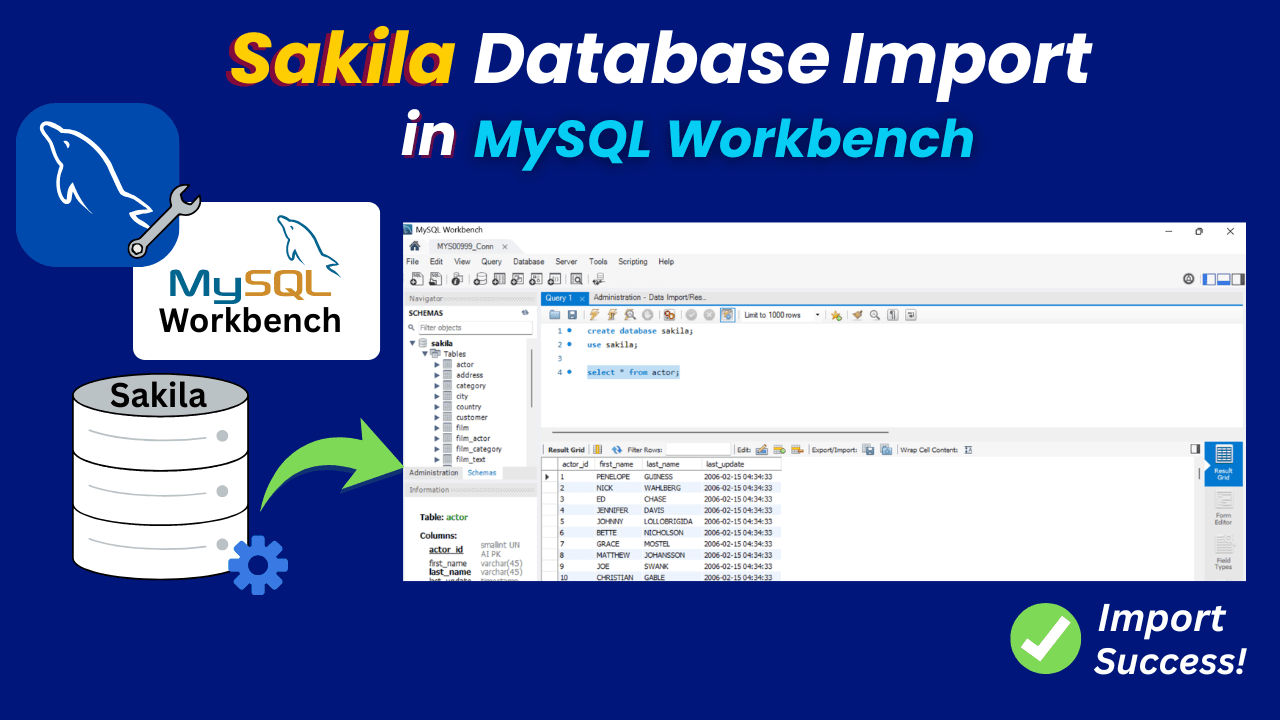
In this guide, you will understand the Sakila database import in MySQL Workbench step-by-step guide thoroughly.
If you want to practice MySQL, the Sakila database is a great place to start. It comes with real-world tables like customers, films, and rentals, which makes learning SQL much easier.
Prerequisites for the Sakila database import
Before starting the process, make sure you have.
1. How to Install MySQL Workbench in Windows. (Included MySQL Workbench download)
2. How to Install the Sakila Database in MySQL.
3. Sakila database files (sakila-schema.sql and sakila-data.sql)
Import of the Sakila database in MySQL Workbench
We need to open the tool after the MySQL Workbench download on the Windows machine.
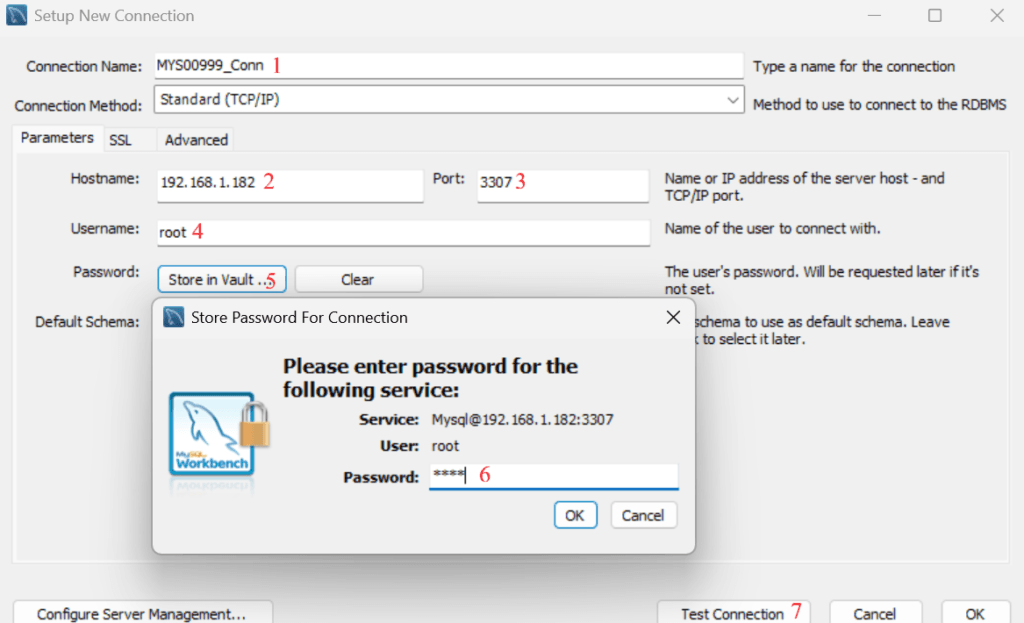
Step 1) Launch MySQL Workbench

Step 2) Connect to your MySQL server
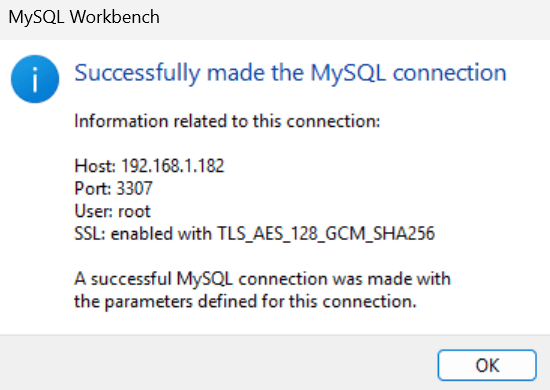
Test Connection Output
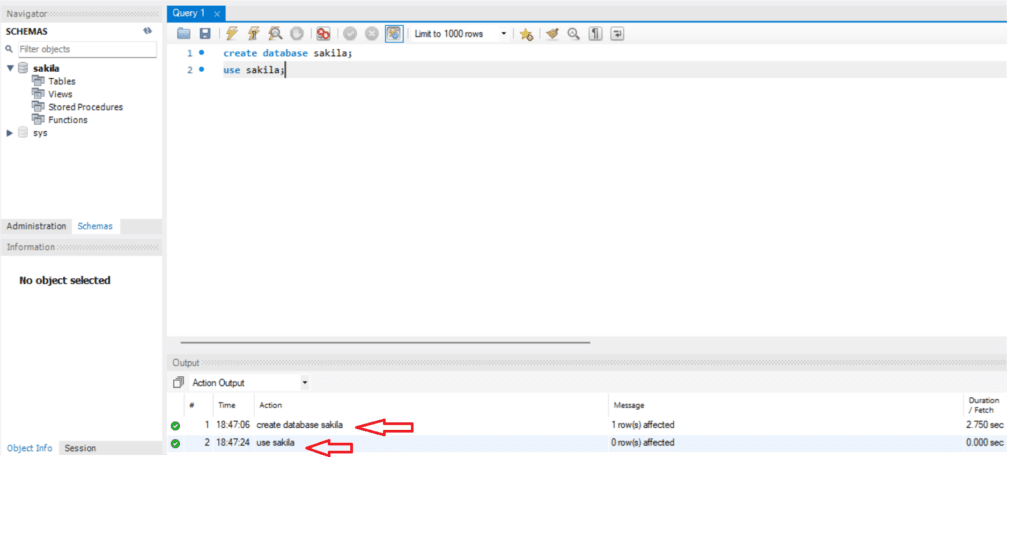
Step 3) Create the Sakila database
We can create the Sakila database by using the command below in MySQL Workbench.
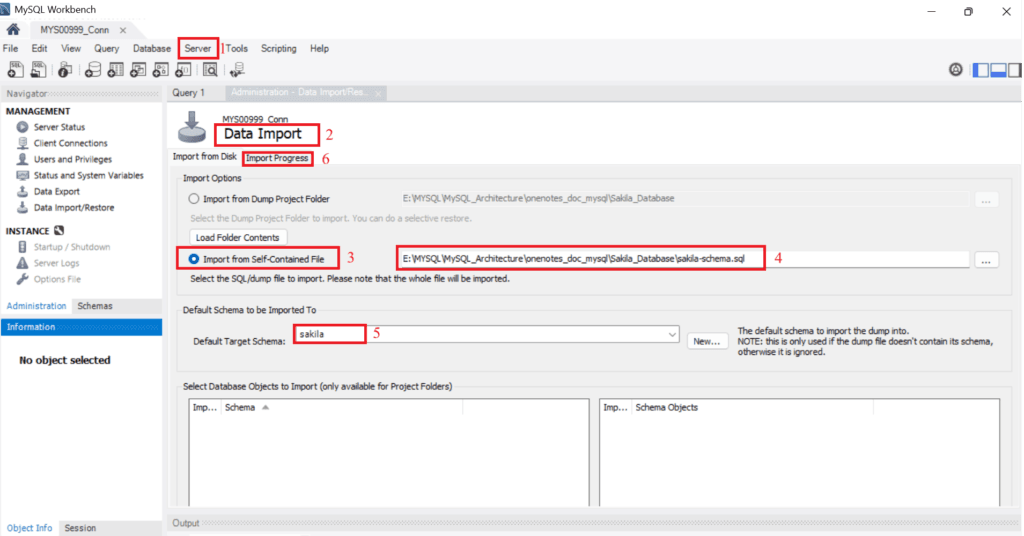
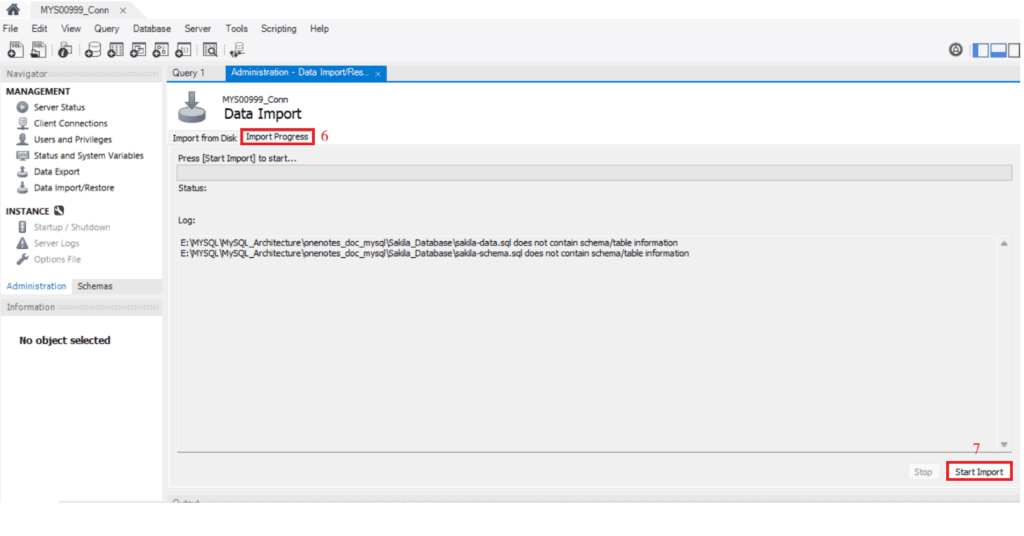
Step 4) Import the Schema File
Now we can import the schema file to create the structure, and later we can use the data file to insert the data.
Go to Server ==> Click Data Import ==> Choose Import from Self-Contained File ==> Choose Sakila as Default Target Schema ==> Change tab from Import from disk to Import Progress ==> Click Start Import
Start Import of Schema File
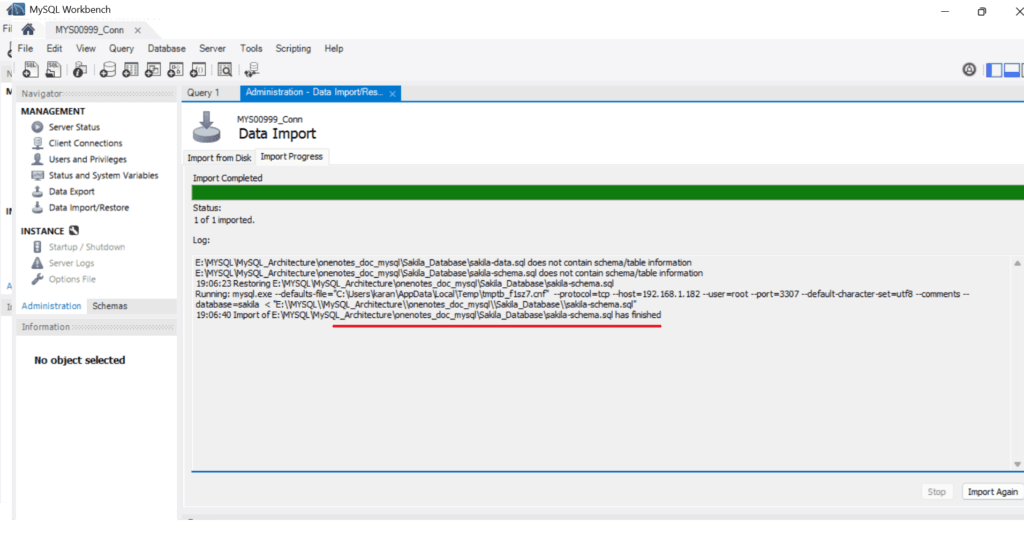
Schema File Import Status
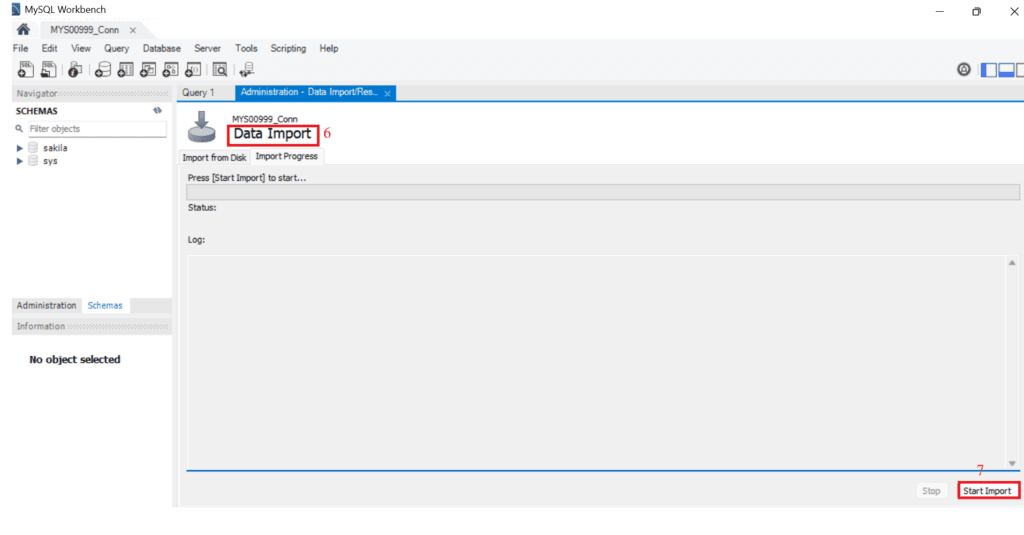
Step 5) Import the Data File
This step helps insert the data into the structure we created in the previous step.

Start Import of Data File
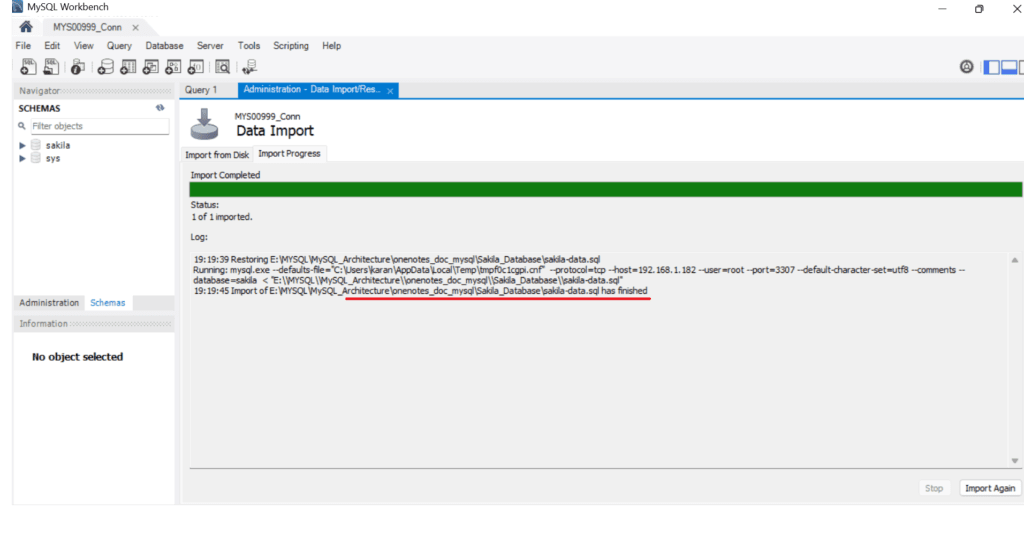
Data File Import Status
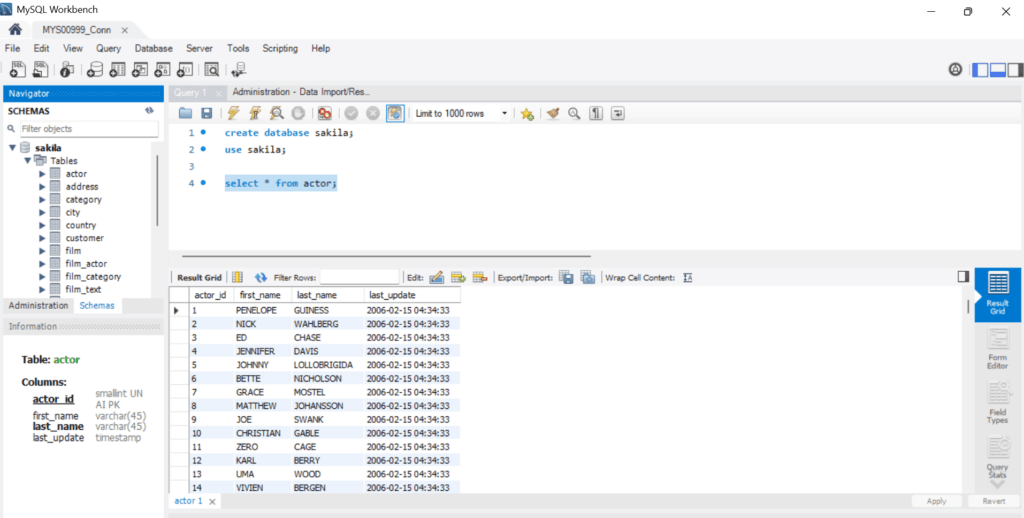
Data check output
We can check the output of one of the tables to make sure the data has been inserted properly.
Conclusion
In this guide, we have seen a step-by-step Sakila Database Import in MySQL Workbench, which is very simple when you follow the right steps. Once imported, you can start practicing SQL queries, joins, and real-world scenarios easily.
If you enjoyed the article, please leave a comment and share it with your friends. Also, let me know which Oracle and MySQL topics you'd like to see covered in future articles.
Note: – If you want to practice this whole activity in your home lab, then you'll need a platform to perform the installation. To set that up, you first need to download and install Oracle VirtualBox, followed by the operating system, the MySQL binary software, and finally, MySQL server creation.
Related Articles
1. How to Install the Sakila Database in MySQL
2. How to Install MySQL Workbench in Windows
3. MySQL Server Installation Using Generic Binary