Table of Contents
Introduction
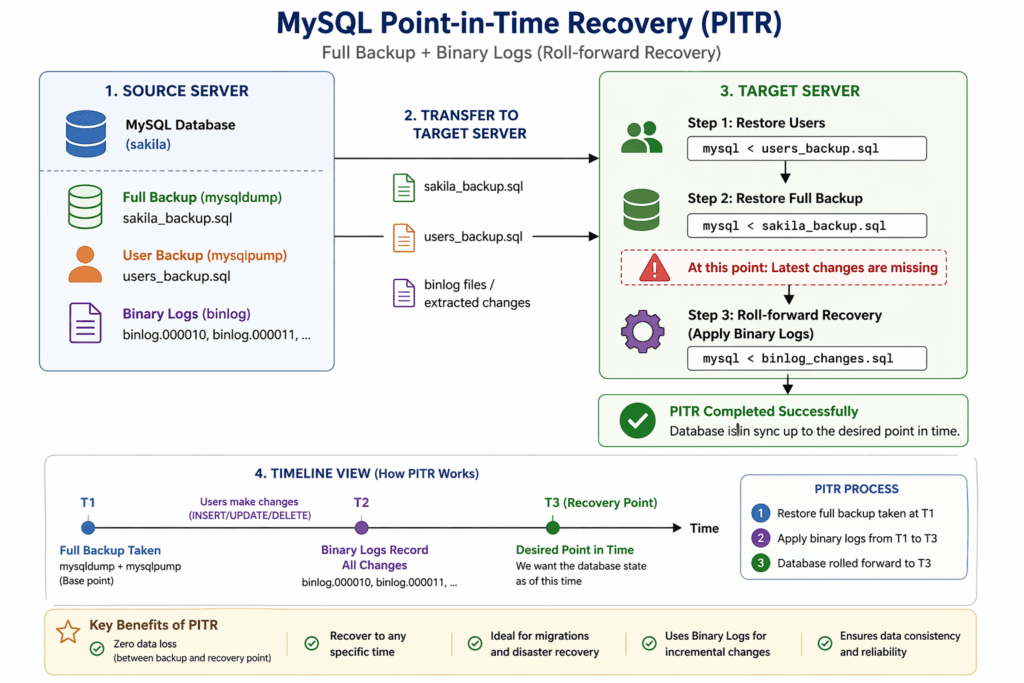
During database migration, data loss is one of the biggest risks for DBAs. A simple backup and restore is usually not enough, especially when live changes continue on the source system.
In this guide, we will walk through a real-world MySQL Point-in-Time Recovery Using Binary Logs scenario where:
1. A database is migrated from one server to another.
2. Changes occurring during migration are captured.
3. Binary logs are used to ensure zero data loss.
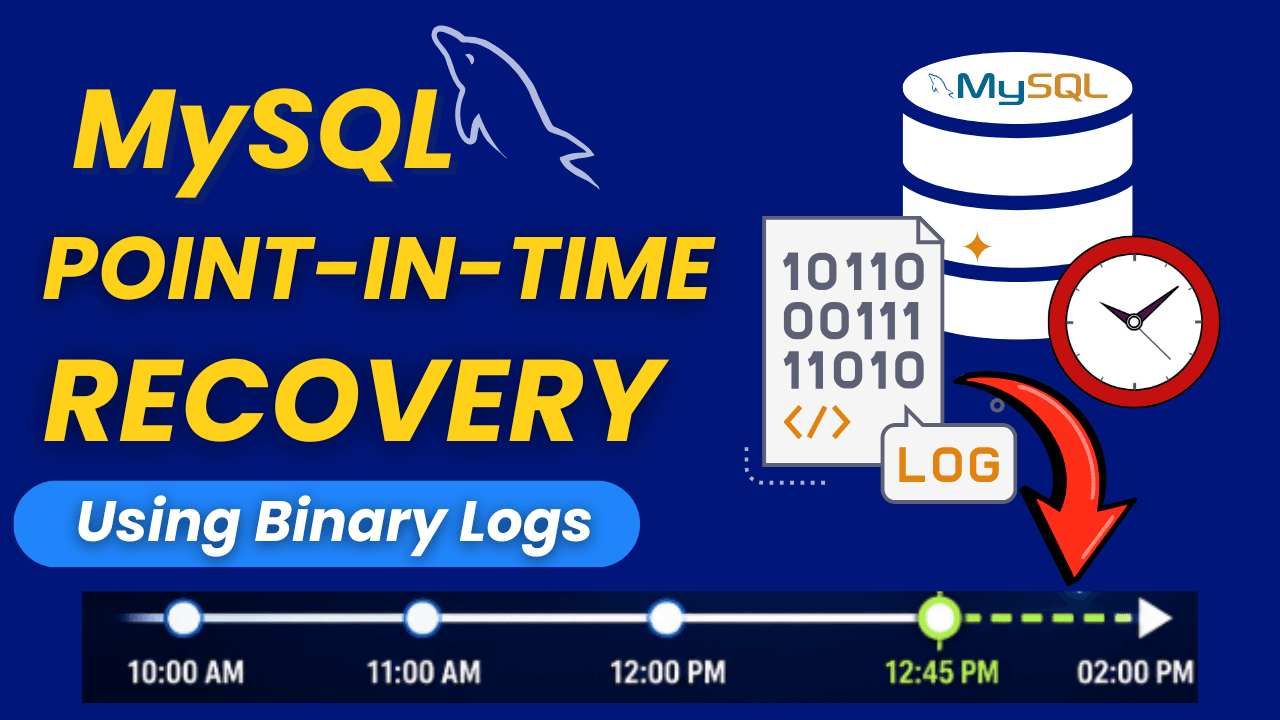
What is MySQL Point-in-Time Recovery Using Binary Logs?
It is a technique where we can:
1. Restore a full backup.
2. Apply changes using binary logs.
3. Bring the database to an exact point in time.
Step-by-Step MySQL PITR Recovery During Migration
| Source Details | Target Details | |
| Server Name | ind001.localdomain.com | ind002.localdomain.com |
| User Name | Sakila_user | Sakila_user |
| Database Name | Sakila | Sakila |
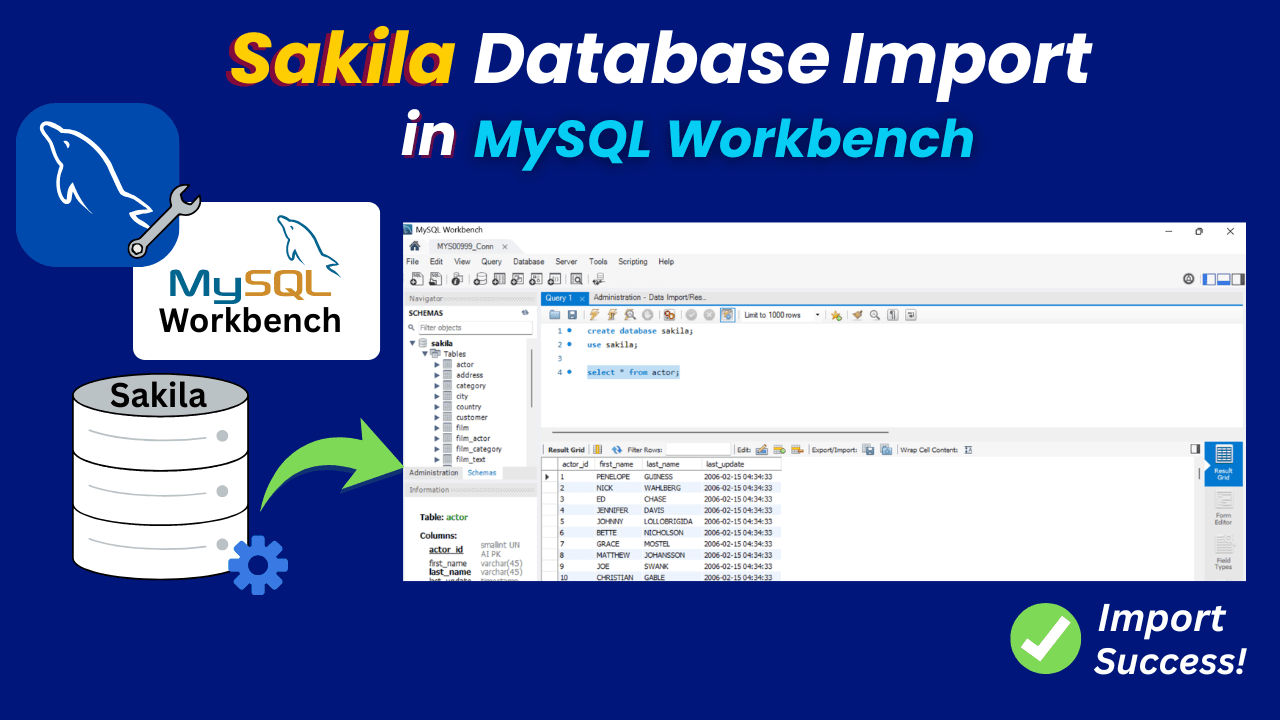
Note: – If the Sakila database is not yet installed in your environment, you can easily set it up by following my detailed guides on installing the Sakila database in MySQL and importing it using MySQL Workbench.
Start by downloading the Sakila sample database from the official MySQL website, and then follow the step-by-step instructions provided in the articles.
Step 1) Take the user backup on the Source side using mysqlpump
Command : - mysqlpump -u root -p --exclude-databases=% --include-users=sakila_user > sakila_user.sqlOutput

Step 2) Take Database Backup Using mysqldump
Command : - mysqldump -u root -p sakila --single-transaction --events --triggers --routines --flush-logs --source-data=2 > sakila_data.sqlOutput

What does each option do during Database Backup?
1. –single-transaction : – Takes a consistent snapshot (no locking for InnoDB)
2. –events : – Includes scheduled events
3. –triggers : – Includes triggers
4. –routines : – Includes stored procedures & functions
5. –flush-logs : – A new binlog file starts, easier tracking for PITR.
6. –source-data=2 : – It stores the binary log file & position (commented)
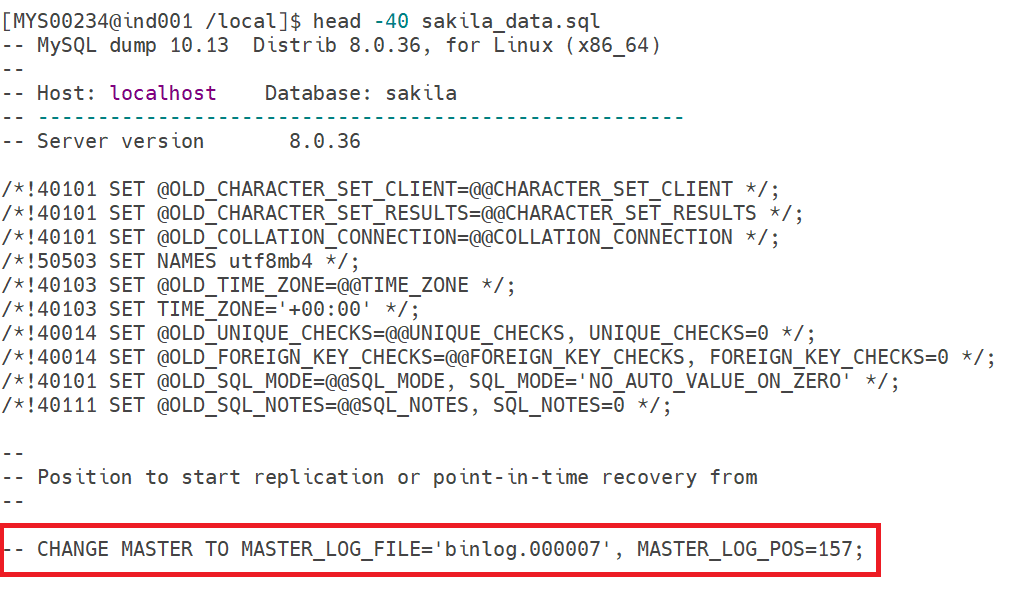
Sample Output inside the Dump file
Step 3) Transfer Backups to the Target Server
Command : - scp sakila_user.sql sakila_data.sql mysql@192.168.1.181:/localOutput

Step 4) Restore Users on the Target Server
On the target server, first check whether the user is present before restoring it.
Command : - select user,host from mysql.user where user='sakila_user';Output
mysql> select user,host from mysql.user where user='sakila_user';
Empty set (0.00 sec)
The user is not present on the target server; let's restore it.
Command : - mysql -u root -p < sakila_user.sql
Again, check on the target side if the user is present now.
Output
mysql> select user,host from mysql.user where user='sakila_user';
+-------------+------+
| user        | host |
+-------------+------+
| sakila_user | %    |
+-------------+------+
1 row in set (0.00 sec)
Now, the user is successfully restored from the backup. Let's proceed to restore the user data as well.
Step 5) Restore Database on the Target Server
On the target server, first check whether the database is present before restoring it.
Command : - show databases;

or

select SCHEMA_NAME,DEFAULT_CHARACTER_SET_NAME,DEFAULT_COLLATION_NAME from INFORMATION_SCHEMA.SCHEMATA  where SCHEMA_NAME='sakila';
Output

The Sakila database is not present on the target server; let's restore it.
Command : - mysql -u root -p sakila < sakila_data.sqlNote: – Before restoring the database, first we need to create it using the create database sakila command, then restore it.
Output
mysql> create database sakila;
Query OK, 1 row affected (0.02 sec)
Again, check on the target side if the Sakila database is present now.

Now, the database is successfully restored from the backup on the target server.
Note: – Till here we have restored the data which is present in the backup, but still the latest changes are missing. So our work is not over yet, we need to apply the missing changes as well here.
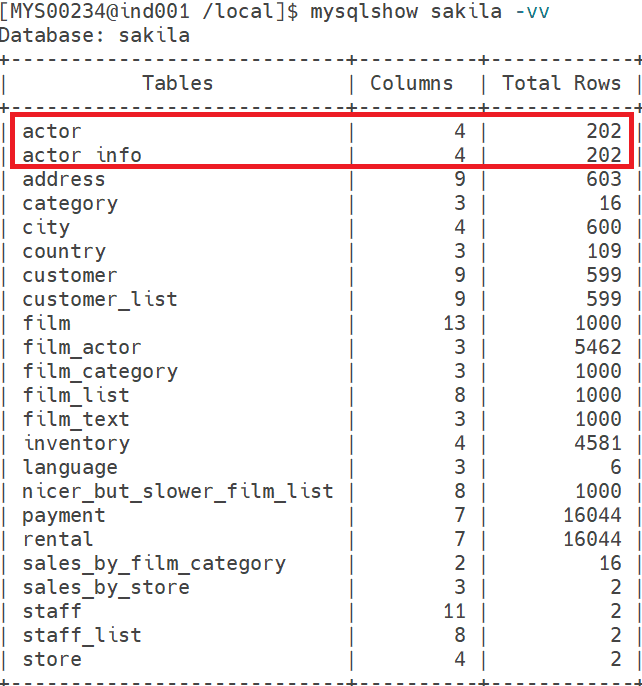
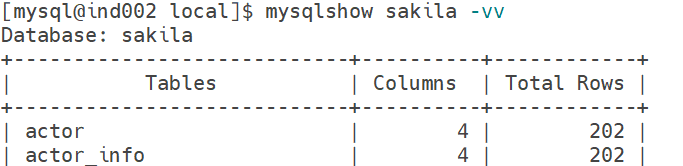
Step 6) Captures the changes in the Source side
Source
Target

Note: – Based on the above output, the actor and actor_info Tables contain 202 rows on the source server, while the target server still shows 200 rows. This confirms that new transactions occurred after the backup was taken. To maintain consistency, these changes must be applied to the target server, which is the main goal of Point-in-Time Recovery (PITR).
Step 7) Extract Changes Using mysqlbinlog
1. First, identify the binlog file and position from the backup at the target side.
-- Position to start replication or point-in-time recovery from
--

-- CHANGE MASTER TO MASTER_LOG_FILE='binlog.000007', MASTER_LOG_POS=157;
2. Now, check the current binlog file and position at the source end.
mysql> show master status;
+---------------+----------+--------------+------------------+-------------------+
| File          | Position | Binlog_Do_DB | Binlog_Ignore_DB | Executed_Gtid_Set |
+---------------+----------+--------------+------------------+-------------------+
| binlog.000007 |      774 |              |                  |                   |
+---------------+----------+--------------+------------------+-------------------+
1 row in set (0.00 sec)
We can see that the file name is the same on both sides. However, the source end position is 774, and at the target end position is 157, which means some transactions had happened at the source side, which we need to extract and apply at the target side.
3. Extract the changes at the source end using the mysqlbinlog utility.
Command : - mysqlbinlog --start-position=157 /local/mysql/MYS00234/data/binlog.000007 > binlog_changes.sql4. Transfer the binglog file to the Target server.
Command : - scp binlog_changes.sql mysql@192.168.1.181:/local5. Apply Binlog Changes on the Target server.
Command : - mysql -u root -p < binlog_changes.sql6. Output after Binlog changes applied.
Conclusion
We can see that both the Source and Target had the exact data, which shows that we successfully performed a Point-in-Time recovery using Binary logs.
If you enjoyed the article, please leave a comment and share it with your friends. Also, let me know which Oracle and MySQL topics you'd like to see covered in future articles.
Note: – If you want to practice this whole activity in your home lab, then you'll need a platform to perform the installation. To set that up, you first need to download and install Oracle VirtualBox, followed by the operating system, the MySQL binary software, and finally, MySQL server creation.
Related Articles
1. How to Install the Sakila Database in MySQL
2. Sakila Database Import in MySQL Workbench
3. ERROR 1045 : Fix MySQL Access Denied for Root User