Table of Contents
Introduction
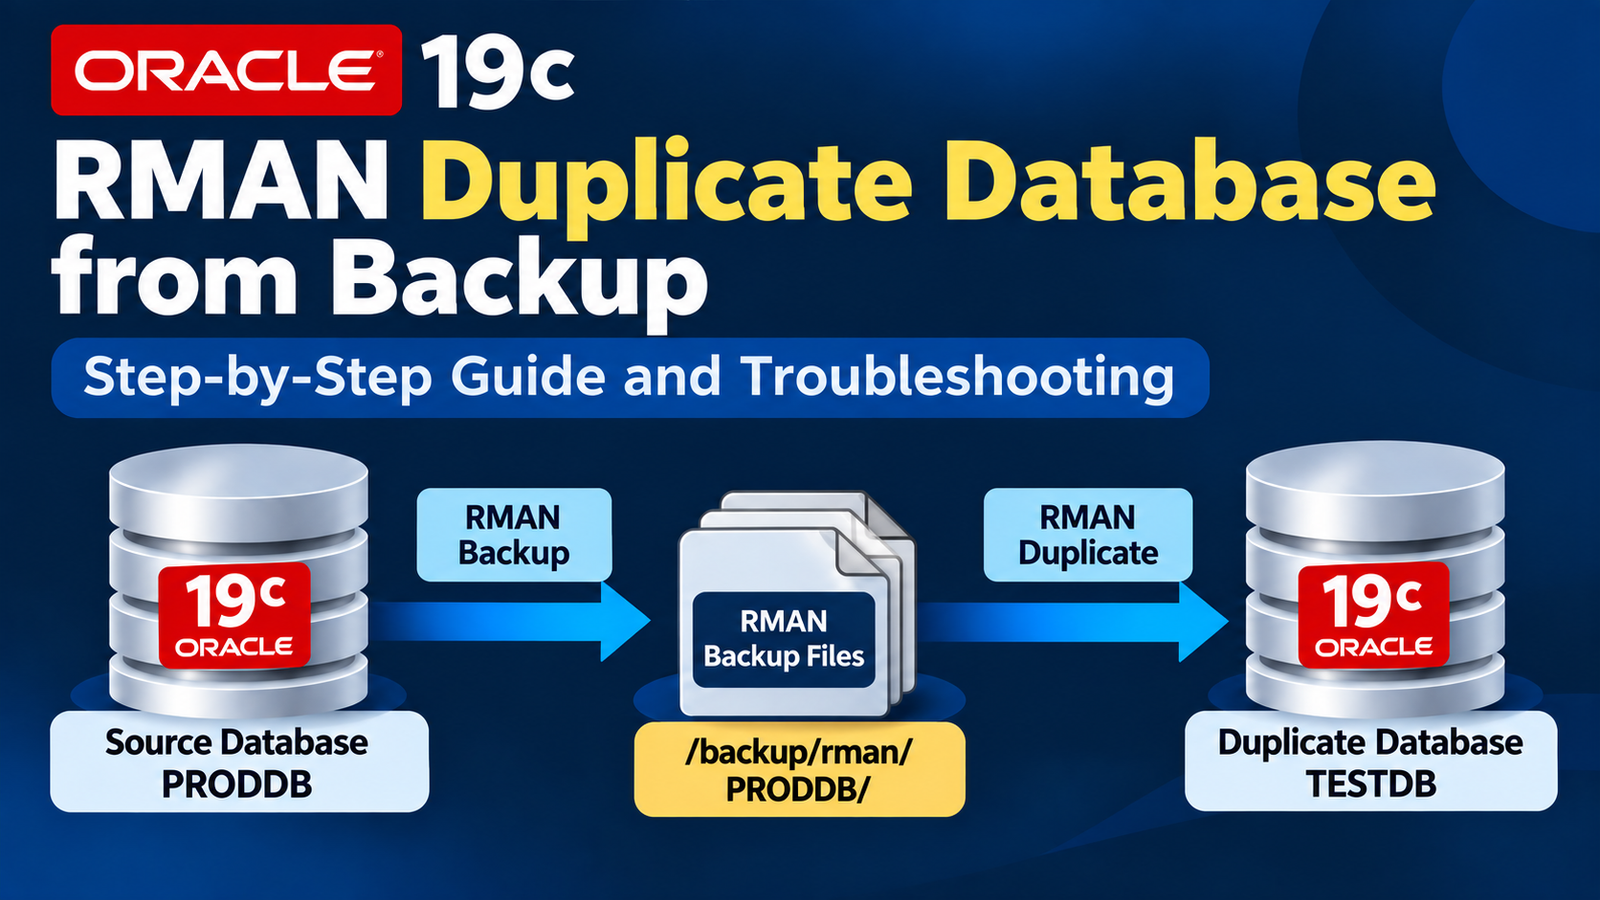
In this article, we will focus on Oracle 19c RMAN duplicate database from backup using the BACKUP LOCATION option.
Duplicating an Oracle database is a common DBA activity when creating development, testing, reporting, refresh, DR, schema refresh, or other non-production environments.
Oracle Recovery Manager (RMAN) provides multiple approaches for database duplication. One option is to duplicate directly from an active source database, while another approach is to use existing RMAN backup pieces.
This practical lab demonstrates the complete backup-based database duplication process using Oracle Database 19c. It also covers common real-world issues and troubleshooting scenarios that can occur when the source and target environments are different.
You can also refer to the Oracle documentation for more details regarding Oracle 19c RMAN Duplicate.
The troubleshooting section covers issues such as:
1. Insufficient DB_FILES on the target database.
2. Multiple source datafile directories.
3. DB_FILE_NAME_CONVERT configuration.
4. LOG_FILE_NAME_CONVERT configuration.
5. Linux filesystem permission problems.
6. Undo tablespace-related errors.
7. Post-duplication validation
Note: The lab setup in this article is simple compared to some production environments. The troubleshooting section covers cases where the source database has a more complex filesystem layout.
What Is RMAN Backup-Based Database Duplication?
RMAN backup-based duplication creates a new Oracle database using RMAN backup pieces instead of copying the database directly from the active source database.
The target database is started in NOMOUNT mode, and RMAN connects to the auxiliary instance.
The backup pieces then restore the control file, datafiles, and required recovery information to the new database.
A typical RMAN command is:
DUPLICATE DATABASE TO TESTDB NOFILENAMECHECK BACKUP LOCATION '/backup/rman/PRODDB';The exact command depends on the source and target configuration.
| Parameter | Source Database | Target Database |
| Database Name | PRODDB | TESTDB |
| Oracle Version | 19c | 19c |
| Role | Primary | Auxiliary / Duplicate |
Lab Environment
For the practical demonstration, we will use a simple two-database setup.
Example filesystem layout
Source:
/u01/app/oracle/oradata/PRODDB/Target:
/u01/app/oracle/oradata/TESTDB/RMAN backup location:
/u01/backup/rmanImportant: The target database does not need to use the same database name or filesystem structure as the source, provided the appropriate file-name conversion and target preparation are performed.
Prerequisites
Before starting the duplication, verify the following.
Source database
- Oracle Database 19c is available.
- Required RMAN backups exist.
- Backup pieces are accessible.
- Required archived redo logs are available if required for recovery.
- Source database information has been collected.
Target server
- Oracle software is installed.
- The target Oracle home is available.
- Required filesystem directories have been created.
- Oracle user has appropriate permissions.
- The password file is available.
- Listener/network configuration is ready where required.
- Sufficient filesystem space is available.
- The target instance can be started in NOMOUNT mode.
Now, let's start the Oracle 19c RMAN Duplicate Database from Backup.
Step 1) Collect Source Database Information
Before performing any duplication, I recommend collecting the source database configuration.
This is an important DBA practice because many RMAN duplication problems are caused by differences between the source and target environments.
Run:
set lines 999 pages 999
col HOST_NAME for a25
col DB_Start_Time for a20
col open_mode for a20
col STATUS for a20
col database_role for a20
col INSTANCE_NAME for a15
col LOGINS for a15
col DB_UNIQUE_NAME for a15
col DB_NAME for a10
SELECT NAME as DB_NAME,DB_UNIQUE_NAME,OPEN_MODE,instance_name,status,HOST_NAME,database_role,logins,to_char(startup_time,'DD-MON-YYYY HH24:MI') DB_Start_Time FROM
gV$INSTANCE,v$database;
Step 2) Check Source Datafiles
Before duplication, collect the complete datafile list.
Run:
set lines 200
set pages 200
col NAME for a70
col STATUS for a40
select File#,name,status,enabled,bytes/1024/1024/1024 "Datafile Size in GB" from v$datafile;
This information is important because the target database must be capable of accommodating the source database's datafiles.
Also check the number of datafiles:
select count(*) from v$datafile;And check the highest file number:
select max(FILE#) from v$datafile;Step 3) Check All Datafile Directories
This is particularly important in production environments.
A source database may have datafiles in several directories.
The following query displays the distinct directories used by the datafiles:
set lines 999 pages 999
col PATH for a80
select distinct regexp_substr(name,'^(.*/)[^/]+$',1,1,null,1) path from v$datafile order by 1;
For example, the source database might contain:
/u01/app/oracle/oradata/PRODDB/
/u02/oradata/PRODDB/data/
/u03/oradata/PRODDB/archive/
This becomes important when configuring DB_FILE_NAME_CONVERT.
Step 4) Check Tempfiles
Collect the tempfile information.
set lines 999
set pages 999
col NAME for a80
select FILE#,TS#,STATUS,BYTES/1024/1024/1024 "Size in GB",NAME from v$tempfile;
You can also use:
set lines 999 pages 999
col FILE_NAME for a80
col TABLESPACE_NAME for a30
alter session set nls_date_format='DD-MM-YYYY HH24;MI:SS';
Select FILE_ID,FILE_NAME, TABLESPACE_NAME, bytes/1024/1024 "Tempfile Size in MB" from dba_temp_files order by FILE_ID;
To identify the distinct redo Temp directories:
set lines 999 pages 999
col PATH for a80
select distinct regexp_substr(FILE_NAME,'^(.*/)[^/]+$',1,1,null,1) path from dba_temp_files order by 1;
This also becomes important when configuring DB_FILE_NAME_CONVERT.
Step 5) Check Redo Log Locations
Check the online redo log members:
set lines 999
set pages 999
col MEMBER for a80
select * from v$logfile;
To identify the distinct redo log directories:
set lines 999 pages 999
col PATH for a80
select distinct regexp_substr(MEMBER,'^(.*/)[^/]+$',1,1,null,1) path from v$logfile order by 1;
This becomes important when configuring LOG_FILE_NAME_CONVERT.
Step 6) Check Available Database Space
Before starting the duplication, check the source database size.
select
"Reserved_Space(GB)", "Reserved_Space(GB)" - "Free_Space(GB)" "Used_Space(GB)","Free_Space(GB)"
from(
select
(select sum(bytes/(1024*1024*1024)) from dba_data_files) "Reserved_Space(GB)",
(select sum(bytes/(1024*1024*1024)) from dba_free_space) "Free_Space(GB)"
from dual );
!date
Also check the target server:
df -h and df -iChecking both disk space and inode availability can prevent filesystem-related failures later in the duplication.
Step 7) Check Control Files
Check the source control file locations:
set lines 999 pages 999
col NAME for a30
Col VALUE for a140
select name,value from v$parameter where name='control_files';
Step 8) Check SPFILE
Check whether the source database is using an SPFILE:
set lines 999 pages 999
col NAME for a30
Col VALUE for a100
select name,value from v$parameter where name='spfile';
The target environment will need an appropriate parameter file configuration.
Step 9) Prepare the Target Database
Before starting the RMAN duplication, prepare the target server according to the existing environment.
If the Target Database Already Exists
If the target database is already created and has an existing directory structure, use the same structure instead of creating new directories.
For example, check the existing database configuration and verify the locations of:
- Datafiles
- Temporary files
- Online redo logs
- Control files
- Fast Recovery Area, if configured
You can check the existing database file locations using:
SELECT name FROM v$datafile;

SELECT name FROM v$tempfile;

SELECT member FROM v$logfile;
Use these locations when preparing the RMAN duplicate environment.
If the Target Database Is New
If the target database is a new environment and the required directories do not already exist, create the directory structure manually.
For example:
mkdir -p /u01/oradata/TESTDB/data
mkdir -p /u01/oradata/TESTDB/temp
mkdir -p /u01/oradata/TESTDB/redolog
Set the appropriate ownership:
chown -R oracle:oinstall /u01/oradata/TESTDBVerify the directories:
ls -ld /u01/oradata/TESTDBThe exact directory structure depends on the target server and the storage layout used in the environment.
Important: Do not assume that every target database uses the same directory structure. Always check the existing target configuration first and prepare the directories accordingly.
Step 10) Prepare the Password File and Network Configuration
The approach depends on whether the target database already exists.
If the Target Database Already Exists
If the target database is already present on the target server, use the existing configuration wherever possible.
Verify the existing:
- Password file
- listener.ora
- tnsnames.ora
- PFILE/SPFILE
- Database directory structure
Modify only the parameters and paths that are required for the RMAN duplication.
If the Target Database Is New
If the target database does not exist, prepare the required configuration manually.
To save time in this lab, the required files were copied from the source server and then modified according to the target environment:
- Password file
- listener.ora
- tnsnames.ora
- PFILE
Update the copied files with the target database name, hostname, port, filesystem paths, and other environment-specific settings.
After preparing the configuration, test the Oracle Net connection:
tnsping TESTDBThen verify the SYS connection:
sqlplus sys@TESTDB as sysdbaThe target database does not need to be fully created at this stage. For an RMAN duplicate, the auxiliary instance can be started in NOMOUNT mode before the duplication begins.
Step 11) Configure DB_FILE_NAME_CONVERT
The configuration depends on whether the target database already exists and whether the source and target datafile paths are different.
If the Target Database Already Exists
If the target database already exists, first check its existing datafile locations and configuration.
If the existing target paths are suitable for the RMAN duplicate, you can use them.
If the source and target paths are different, configure DB_FILE_NAME_CONVERT according to the required source-to-target mapping.
For example:
ALTER SYSTEM SET DB_FILE_NAME_CONVERT = '/u01/oradata/PRODDB/','/u01/oradata/TESTDB/' SCOPE=SPFILE;If the Target Database Is New
If the target database is new, first prepare the required directories and configuration files as described in the previous steps.
Start the auxiliary database in NOMOUNT mode:
STARTUP NOMOUNT;Once the instance is started in NOMOUNT mode, configure DB_FILE_NAME_CONVERT in the SPFILE:
ALTER SYSTEM SET DB_FILE_NAME_CONVERT = '/u01/oradata/PRODDB/',
'/u01/oradata/TESTDB/' SCOPE=SPFILE;
Since the parameter is being changed with SCOPE=SPFILE, restart the auxiliary instance so that the new setting takes effect:
SHUTDOWN IMMEDIATE;
STARTUP NOMOUNT;
Verify the parameter:
SHOW PARAMETER DB_FILE_NAME_CONVERT;For example:
Source:
/u01/oradata/PRODDB/Target:
/u01/oradata/TESTDB/This tells Oracle to convert datafile paths from the source location to the corresponding target location during the duplication.
Note: DB_FILE_NAME_CONVERT is required only when the source and target datafile paths need to be mapped to different locations. If the paths are already suitable for the target environment, this parameter may not be required.
Step 12) Configure LOG_FILE_NAME_CONVERT
Similarly, configure the redo log path conversion:
ALTER SYSTEM SET LOG_FILE_NAME_CONVERT = '/u01/oradata/PRODDB/redolog/',
'/u01/oradata/TESTDB/redolog/' SCOPE=SPFILE;
Since these parameters are configured with SCOPE=SPFILE, the auxiliary database must be restarted for the changes to take effect.
Restart the auxiliary instance:
SHUTDOWN IMMEDIATE;
STARTUP NOMOUNT;
After the restart, verify the parameters again:
SHOW PARAMETER db_file_name_convert;

SHOW PARAMETER log_file_name_convert;
The auxiliary database is now ready for the RMAN duplicate operation.
Step 13) Drop the Existing Target Database
If the target database already exists and needs to be recreated, the existing database may need to be removed first.
Before dropping the database, it is a good practice to keep a backup of the current SPFILE by creating a PFILE from it.
First, verify the SPFILE being used:
SHOW PARAMETER spfile;Create a PFILE backup:
CREATE PFILE='/u01/app/oracle/product/19.0.0/dbhome_1/dbs/initTESTDB_backup.ora'
FROM SPFILE;
Verify that the PFILE was created:
ls -l /u01/app/oracle/product/19.0.0/dbhome_1/dbs/initTESTDB_backup.oraNow verify that you are connected to the correct target database:
SELECT NAME, DB_UNIQUE_NAME FROM V$DATABASE;If the database is the intended target, enable restricted session:
ALTER SYSTEM ENABLE RESTRICTED SESSION;Then drop the database:
DROP DATABASE;Important: DROP DATABASE is destructive. Never execute this command against the wrong database.
The PFILE created earlier can be used to recreate the SPFILE if required. For example:
CREATE SPFILE='/u01/app/oracle/product/19.0.0/dbhome_1/dbs/spfileTESTDB.ora'
FROM PFILE='/u01/app/oracle/product/19.0.0/dbhome_1/dbs/initTESTDB.ora';
This provides a simple recovery option before proceeding with the RMAN duplication.
Step 14) Start the Auxiliary Database in NOMOUNT
After preparing the target parameter file:
STARTUP NOMOUNT;Verify that the instance is started:
SELECT STATUS FROM V$INSTANCE;The expected state is:
STARTEDAt this point, the auxiliary database does not need to be mounted.
Step 15) Transfer RMAN Backup Files to the Target Server
Before starting the RMAN duplicate, the backup pieces created on the source database must be available on the target server.
In this lab, the RMAN backup is taken on the source database and then transferred to the target server.
1. Take the RMAN Backup on the Source
For example:
run
{
ALLOCATE CHANNEL C1 TYPE DISK;
ALLOCATE CHANNEL C2 TYPE DISK;
ALLOCATE CHANNEL C3 TYPE DISK;
ALLOCATE CHANNEL C4 TYPE DISK;
CONFIGURE CONTROLFILE AUTOBACKUP ON;
BACKUP INCREMENTAL LEVEL 0 DATABASE FORMAT '/u01/backup/rman/%d_%T_%u.bkp';
BACKUP ARCHIVELOG ALL DELETE INPUT FORMAT '/u01/backup/rman/%d_%T_%u_arc.bkp';
BACKUP CURRENT CONTROLFILE FORMAT '/u01/backup/rman/cf_%d_t%t_s%s_p%p';
BACKUP CURRENT CONTROLFILE FOR STANDBY FORMAT '/u01/backup/rman/stndby_cf_%d_t%t_s%s_p%p';
RELEASE CHANNEL C1;
RELEASE CHANNEL C2;
RELEASE CHANNEL C3;
RELEASE CHANNEL C4;
}
After the backup completes, verify the backup pieces:
ls -lrt /u01/backup/rmanFrom RMAN:
crosscheck backup;

list backup summary;

validate backupset <Key>;
2. Transfer the Backup to the Target
Copy the backup pieces from the source server to the target server.
For example, using scp:
scp /u01/backup/rman/*.bkp oracle@target-server:/u01/backup/rmanIf the backup contains multiple files, make sure all required backup pieces and archive logs are transferred.
You can also use other file-transfer methods such as rsync, NFS, or shared storage depending on the environment.
3. Verify the Backup on the Target
On the target server:
ls -lrt /u01/backup/rmanMake sure the Oracle software owner has permission to read the backup files:
ls -l /u01/backup/rmanIf required:
chown -R oracle:oinstall /u01/backup/rmanThe backup location on the target should be accessible to the Oracle user because RMAN will use these backup pieces during the duplication.
Step 16) Create the RMAN Duplicate Script
Create an RMAN command file.
Create an rcv or any other file and put the run block content inside it, so that the duplicate command can be run in the background using the nohup command.
cd u01/backup/rman/

vi testdb.rcv
run
{
ALLOCATE AUXILIARY CHANNEL C1 DEVICE TYPE DISK;
ALLOCATE AUXILIARY CHANNEL C2 DEVICE TYPE DISK;
DUPLICATE DATABASE TO testdb NOFILENAMECHECK BACKUP LOCATION '/u01/backup/rman/';
}
The number of auxiliary channels should be selected according to the available CPU, storage throughput, and environment.
Step 17) Run RMAN DUPLICATE
Execute RMAN against the auxiliary instance.
nohup rman AUXILIARY / cmdfile=/u01/backup/rman/testdb.rcv >> /u01/backup/rman/testdb.log &Monitor the log:
tail -100f /u01/backup/rman/testdb.log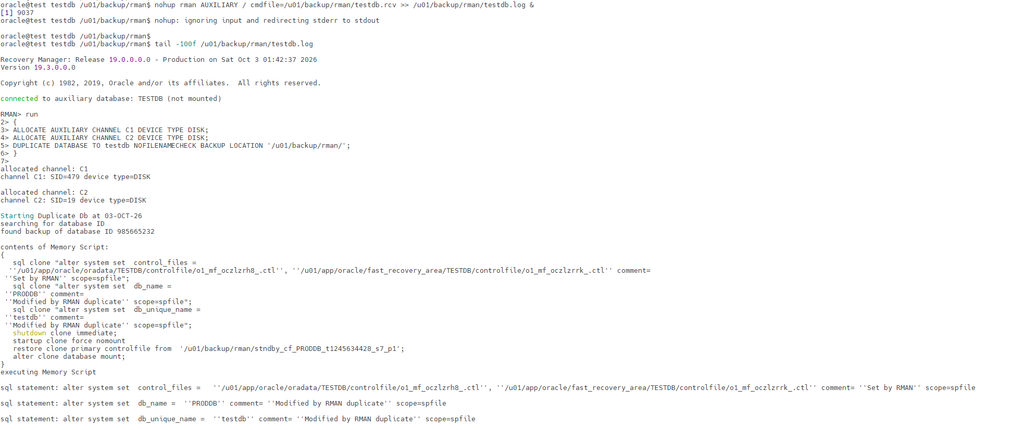
Step 18) Post-Duplication Validation
Once RMAN reports successful completion, validate the target database.
Check database status
SELECT NAME as DB_NAME,DB_UNIQUE_NAME,OPEN_MODE,instance_name,status,HOST_NAME,database_role,logins,to_char(startup_time,'DD-MON-YYYY HH24:MI') DB_Start_Time FROM
gV$INSTANCE,v$database;
Check instance
select instance_name,status,host_name from v$instance;Check datafiles
select File#,name,status,enabled,bytes/1024/1024/1024 "Datafile Size in GB" from v$datafile;Check redo logs
SELECT GROUP#,MEMBER FROM V$LOGFILE ORDER BY GROUP#;Check tempfiles
Select FILE_ID,FILE_NAME, TABLESPACE_NAME, bytes/1024/1024 "Tempfile Size in MB" from dba_temp_files order by FILE_ID;Step 19) Real-World Troubleshooting: ORA-00059
One of the useful lessons from a real duplication exercise is that the source and target databases must have compatible parameter limits.
During one duplication attempt, RMAN failed with:
RMAN-00571: ===========================================================
RMAN-00569: =============== ERROR MESSAGE STACK FOLLOWS ===============
RMAN-00571: ===========================================================
RMAN-03002: failure of Duplicate Db command at 09/29/2026 16:39:42
RMAN-05501: aborting duplication of target database
RMAN-03015: error occurred in stored script Memory Script
RMAN-06136: Oracle error from auxiliary database: ORA-00059: maximum number of DB_FILES exceeded
The investigation showed that the source database had:
MAX(FILE#) = 208while the target database had:
db_files = 200The source and target therefore did not have enough capacity aligned for the number of datafiles being restored.
How to identify this before duplication
On the source:
SELECT MAX(FILE#) FROM V$DATAFILE;On the target:
SHOW PARAMETER db_files;This is an excellent pre-check to include in an RMAN duplication checklist.
Step 20) Real-World Troubleshooting: Multiple Datafile Paths
Another important scenario occurs when the source database uses multiple datafile directories.
During one duplication attempt, RMAN failed with:
RMAN-00571: ===========================================================
RMAN-00569: =============== ERROR MESSAGE STACK FOLLOWS ===============
RMAN-00571: ===========================================================
RMAN-03002: failure of Duplicate Db command at 09/30/2026 00:58:13
RMAN-05501: aborting duplication of target database
RMAN-03015: error occurred in stored script Memory Script
ORA-19849: error while reading backup piece from service ORA0XXXX
ORA-19504: failed to create file "/local/oracle/ORA0XXXX/data/TBS_DEFRAG_DO_NOT_DELETE/TBS_DEFRAGDATA20.dbf"
ORA-27040: file create error, unable to create file
Linux-x86_64 Error: 13: Permission denied
Additional information: 3
For example:
Source:

/local/oracle/ORA0XXXX/TBS_DEFRAG_DO_NOT_DELETE/
/local/oracle/ORA0XXXX/data/
/local/oracle/ORA0XXXX/data/NS2/
/local/oracle/ORA0XXXX/data/TBS_DEFRAG_DO_NOT_DELETE/
If only one source path is configured in DB_FILE_NAME_CONVERT, RMAN may not map all files to the intended target locations.
The solution is to identify all distinct source paths first:
select distinct regexp_substr(name,'^(.*/)[^/]+$',1,1,null,1) path from v$datafile order by 1;Then build the conversion mapping accordingly.
This is one of the reasons I recommend performing a source database filesystem inventory before starting the duplicate.
Step 21) Real-World Troubleshooting: Undo Tablespace Error
Another failure encountered during a subsequent operation was:
RMAN-00571: ===========================================================
RMAN-00569: =============== ERROR MESSAGE STACK FOLLOWS ===============
RMAN-00571: ===========================================================
RMAN-00601: fatal error in recovery manager
RMAN-03004: fatal error during execution of command
RMAN-04006: error from auxiliary database: ORA-12537: TNS:connection closed
RMAN-03002: failure of Duplicate Db command at 09/30/2026 20:30:29
RMAN-05501: aborting duplication of target database
RMAN-03015: error occurred in stored script Memory Script
RMAN-06136: Oracle error from auxiliary database: ORA-00603: ORACLE server session terminated by fatal error
ORA-01092: ORACLE instance terminated. Disconnection forced
ORA-30012: undo tablespace 'UNDOTBS1' does not exist or of wrong type
Process ID: 475856
Session ID: 128 Serial number: 21318
This demonstrates an important troubleshooting principle:
Important: Do not assume that every RMAN error requires restarting the entire database duplication process immediately.
Troubleshooting Steps
First, check which undo tablespace is configured on the source database.
SHOW PARAMETER undo_tablespace;You can also verify it using:
SELECT PROPERTY_VALUE FROM DATABASE_PROPERTIES
WHERE PROPERTY_NAME = 'LOCAL_UNDO_ENABLED';
Then check the target/auxiliary database and compare the undo configuration:
SHOW PARAMETER undo_tablespace;In this case, the source and target configurations had a mismatch in the undo tablespace configuration.
Before making any changes, also verify the other important RMAN duplicate settings:
- RMAN backup and recovery configuration
- Parameter configuration
- Datafile mapping
- Filesystem paths and permissions
- Auxiliary database startup state
- Undo tablespace configuration
- Oracle Net connectivity
If these settings are correct and the problem is specifically related to the undo tablespace, update the target auxiliary database to use the same undo tablespace name as the source database.
For example:
ALTER SYSTEM SET undo_tablespace='UNDOTBS1' SCOPE=SPFILE;After changing the parameter, start the auxiliary database again in NOMOUNT mode:
STARTUP NOMOUNT;Then verify the parameter:
SHOW PARAMETER undo_tablespace;Once the auxiliary database starts successfully and the undo configuration is correct, continue with the RMAN duplicate operation.
Important: Do not change the undo configuration blindly. First, compare the source and target settings and confirm that the specified undo tablespace exists and is appropriate for the target environment.
Conclusion
We have successfully performed the Oracle 19c RMAN Duplicate Database from Backup steps.
The actual DUPLICATE DATABASE command may be only a few lines, but the preparation around it is what determines whether the operation completes successfully.
The biggest lesson from real-world duplication exercises is that RMAN errors are not always RMAN problems. Issues such as an insufficient DB_FILES setting, incorrect datafile path mappings, or Linux filesystem permissions can all cause the duplication to fail.
By performing the pre-checks before starting the duplicate, many of these problems can be identified before they become RMAN failures.
👍 Enjoyed This Practical?
If you found this practical useful, please consider sharing it with your friends and colleagues.
🔗 Follow me on LinkedIn | 📢 Join my Telegram Community
💬 What would you like me to cover next? Share your suggestions in the comments.
Thank you for reading and supporting the blog! 🙏